
CentOS 7 is the big major release of the CentOS Linux distribution. It is based on Red Hat Enterprise Linux 7, which is derived from Fedora Linux version 19. It was first released on July 7th, 2014 and will be supported for 10 years, up through June 30th, 2024.
The OS Selection should be compatible for what we are setting up on the server, this is the most important thing. I will recommend to select CentOS 7 because this supports almost is all the hardware.
CentOS 7 includes several major changes that pertain to booting up and managing the system. It is the first to introduce “systemd” which controls how services are started up, as well as many system settings. It also includes “firewalld” as a new method of managing the server’s firewall.
CentOS 7 also provides updates most common hosting software. I have setup SMTP, WordPress, SQL and some other email marketing on the CentOS 7 which is running smoothly.
Download CentOS 7 from Official Website
- CentOS-7-x86_64-DVD-1908.iso [4.3G]
- CentOS-7-x86_64-Everything-1908.iso [10G]
- CentOS-7-x86_64-LiveGNOME-1908.iso [1.4G]
- CentOS-7-x86_64-LiveKDE-1908.iso [1.8G]
- CentOS-7-x86_64-Minimal-1908.iso [918M]
- CentOS-7-x86_64-NetInstall-1908.iso [507M]
# Once download complete , burn image to DVD or make it bootable USB
# Insert DVD or USB
# Restart the computer and go to boot menu and select appropriate device
Steps to install CentOS 7
# After booting computer the below screen will appear. Select ” Install CentOS 7 ” from the given menu with the help of control keys which is up-down arrow keys
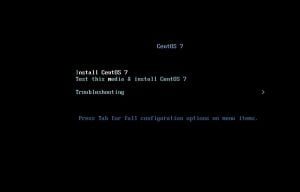
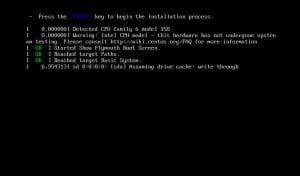
# After selecting the CentOS 7, Just hit enter
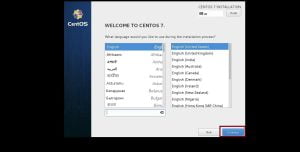
# Now, select your country with date and time or you can also adjust time / date after the installation
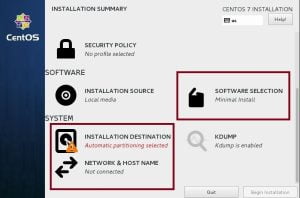
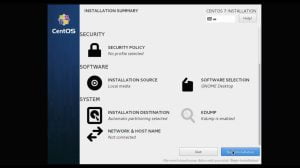
# This is the most important thing during the installation process. Don’t forget to select ” SOFTWARE SELECTION ” and ” INSTALLATION DESTINATION “, you can setup ” NETWORK & HOST NAME “ after the installation
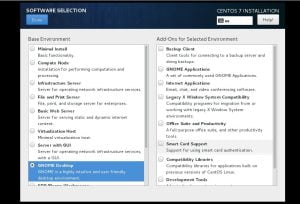
# Below screen is the post ” SOFTWARE SELECTION “, from this menu you can select any base environment and add-Ons. I will highly recommend you to select ” GNOME Desktop ” or ” Server with GUI ” because it is user friendly which is GUI. The default installation would be ” Minimal Install “, in this you’ll see only command line interface
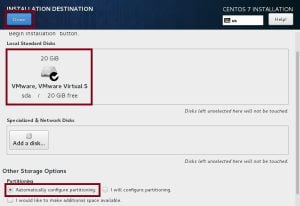
# This is the second most important thing during installation procedure. I will highly recommended you to select ” Automatic Configure Partitioning ” and click done
# Now, the installation process will begin after clicking begin installation as below screen
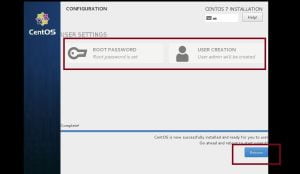
# During the installation you will have to create user and set the root user password. After some time installation process will be complete and machine will be ask to restart as per below, now restart the machine
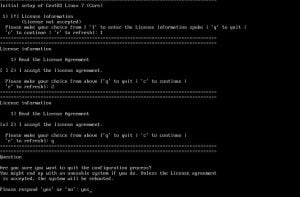
# This is one of the most important thing which is for accepting license
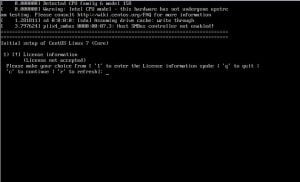
# Just type here – Numeric ” 1 ” then enter key ( Read the agreement ) Numer ” 2 ” then enter key ( accept the license agreement ), final alphabet would be ” q ” ( quit & restart )
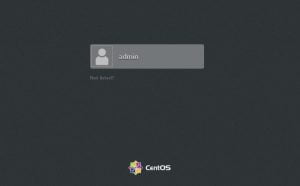
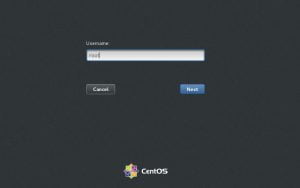
# After the reboot the logon screen will be appear. You can login with the user which you have created during the installation process or you can login with root user by selecting Not listed option
# I have logged in with root user, screen will look like below after the successful installation


After looking over a number of the blog posts on your web page, I honestly appreciate your way
of writing a blog. I bookmarked it to my bookmark webpage list and will be checking back
soon. Please check out my website too and tell me how you feel.
Usually I don’t read post on blogs, but I would like
to say that this write-up very pressured me to take a look at and do it!
Your writing taste has been amazed me. Thank you, very great post.
Please let me know if you’re looking for a article author for your site.
You have some really great articles and I feel I would be a good asset.
If you ever want to take some of the load off, I’d really like to write some
material for your blog in exchange for a link back to mine.
Please send me an email if interested. Cheers!