
This post is about how to install and configure Dovecot on CentOS 7 which enables POP and IMAP in your system and turns into mail server. Lets learn something about Dovecot installation and its configuration by Video Tutorial and by some easy steps with picture
What is Dovecot ?
Dovecot is a mechanism of receiving email, it is a open source configure as IMAP and POP server for the Linux / Unix system. We can plan small and large installations, it is very quick very simple to setup doesn’t require special administration rights and its uses very less space.
Dovecot performs well as IMAP server which supports the standard mbox and Maildir formats. The mailboxes easily indexed from this feature Dovecot performance very well, still providing full compatibility for handing tools of previous mailbox. Dovecot is effectively extensible, Modules can include new directions, alter existing conduct, include their very own information into list records or even include support for new post box groups. For instance quantity and ACL support are totally executed as modules
Steps to Install and Configure Dovecot
1. Update System and Install Dovecot
# sudo yum update -y

# sudo yum install dovecot -y
Follow the below command to edit the config file
# sudo vi /etc/dovecot/dovecot.conf
Uncomment and change the following lines in the file
protocols = imap pop3 lmtp
listen = *
2. Configure Authentication files
Authentication content file is located at /etc/dovecot/conf.d/10-auth.conf, edit with vi editor
# sudo vi /etc/dovecot/conf.d/10-auth.conf
In this file, find and uncomment the following line
disable_plaintext_auth = no
auth_mechanisms = plain login
This auth_mechanisms parameter identify the method that the email client will be authenticate with Dovecot Server.
Now, Configure the mail location by editing the following file located /etc/dovecot/conf.d/10-mail.conf
# sudo vi /etc/dovecot/conf.d/10-mail.conf
Add the following line if not exist, else find and uncomment the following
mail_location = maildir:~/Maildir
3. Configure Postfix SMTP Authentication
Now, configure the socket for postfix ( SMTP ) authentication. This file is located at /etc/dovecot/conf.d/10-master.conf directory, open and edit with the following vi command
# sudo vi /etc/dovecot/conf.d/10-master.conf
Add the following lines in this file as follow
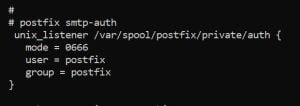
# Postfix smtp-auth
unix_listener /var/spool/postfix/private/auth {
mode = 0666
user = postfix
group = postfix
}
4. Disable the SSL
Set SSL = no
# sudo vi /etc/dovecot/conf.d/10-ssl.conf

5. Create a mailbox with permission
Before create a mailbox, add an user into dovecot server
# sudo useradd test5
Create the mailbox directory for user you have created
# sudo mkdir /home/test5/Maildir
Give full permission on mailbox directory to your user
#  sudo chown test:test /home/test5/Maildir

#  sudo chmod -R 700 /home/test5/Maildir
Add the following port into firewall to access dovecot services
# sudo firewall-cmd --permanent --add-port=110/tcp

# sudo firewall-cmd --permanent --add-port=143/tcp
# sudo firewall-cmd --reload
Start and enable dovecot on boot
#  sudo systemctl start dovecot

#  sudo systemctl enable dovecot
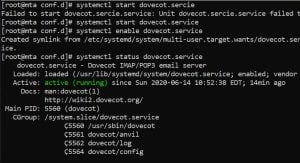
6. Check the Dovecot status
# sudo systemctl status dovecot
7. Final step is to test the dovecot by the telnet command
How to install and configure telnet
Now test POP and IMAP port by the following command which will confirm Dovecot configuration is OK
POP
# telnet your-server-fqdn 110

IMAP
# telnet your-server-fqdn 143

Video Tutorial
I hope you have followed all the steps to configure Dovecot server. Please comment if you have any query.


Hey just wanted to give you a quick heads up. The text in your article
seem to be running off the screen in Firefox. I’m not sure if this is a format issue or
something to do with browser compatibility but I thought I’d
post to let you know. The style and design look great though!
Hope you get the issue solved soon. Thanks
When some one searches for his required thing, so he/she wishes to be available that
in detail, thus that thing is maintained over here.
Simply want to say your article is as surprising. The clarity in your put up is just great and that i can suppose you’re knowledgeable in this subject.
Fine with your permission allow me to grasp your feed
to stay updated with approaching post. Thanks a
million and please continue the enjoyable work.
Many Thanks Mate..Share with Others too..