
If you are looking about how to create user in Office 365 then I will say ‘yes’ your are on right page here in this post I will be showing Admin panel interface and how to create user in Microsoft Office 365. Lets learn something about how to create user on MS Office 365 with Video Tutorial as well as steps with pictures.
Users can be create in Office by Admin of Office 365. Admin account has a special permission to create users, DL, logs monitoring,Azure Active Directory and so on in MS Office 365. Admin Account has BI license which is totally free given by the MS Office 365. In every organization there is at least one Admin account in Office 365 to manage everything in Office 365. Basically Admin account is created by VENDOR from where your organization has procured Office 365 services and licenses.
Steps To Add User in Office 365
1. Open the following link and login with your Admin Account ID
https://login.microsoftonline.com

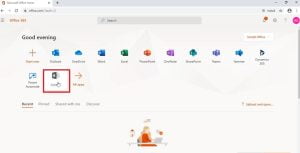
2. Following screen will appear on successful login, there are multiple options just navigate to Admin.
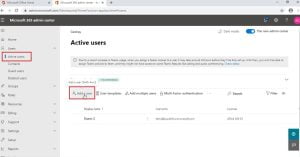
3. You will be redirected to a new page on Admin Center, there is several options in left side panel. To create user go to Active users and there you will find the option to Add a user.
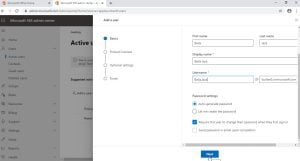
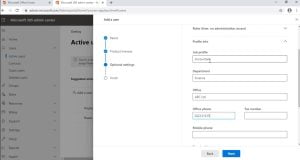
4. In this area you will have to assign the user id ( email id of O365 ) you can make it simple like first name.last name or whatever as per company’s requirement.
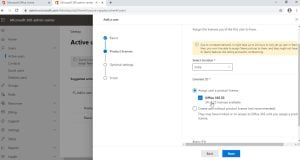
5. Most important is to provide license. I have Office 365 E3 license you can provide license as per which license your company has procured
6. If he/she is a regular user then there is no need to give administrator access to that user, go to next.
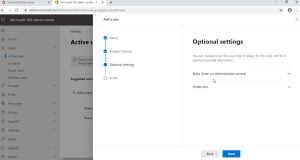
7. Final step is to provide some more details about the user like Job Title, Department, Phone Number, etc and you’re done.
Video Tutorial
This is very simple steps to create user in Office 365. Share with your friends and comment about your doubts.


I always emailed this web site post page to all
my associates, because if like to read it afterward my friends will
too.
Hi Dear, are you genuinely visiting this web site on a regular
basis, if so after that you will absolutely take pleasant knowledge.