
Webmin is a web-based system configuration tool for Unix-like systems, although recent versions can also be installed and run on Windows. In this post you will learn how to install and configure Webmin On CentOS 7.
What is Webmin ?
Webmin is to manage multiple hosts from the single web interface. It works like Cpanel and PhpMyAdmin, both are web interfaces. Webmin allows a given user to manage the bind DNS, Postfix, Dovecot, MySQL database user permissions etc all within the context of that particular domain manage by the web interface.
Requirement
- Fresh installed CentOS 7 with at least 1GB of RAM and core2duo
- Fully Qualified Domain Name should be a point to on server’s IP address
Steps to install Webmin
1. First of all, update your system from the following command
# sudo yum update -y
Restart your system after update and login with root user
2. The second thing is to setup the domain name and FQDN to make Webmin function properly. Edit the files /etc/hostname, /etc/hosts and put your server name and FQDN as below. I am sharing some screenshot where my hostname is “mta” and FQDN is ” mta.techsbucket.in “. Select your desire hostname and FQDN
# sudo vi /etc/hostname
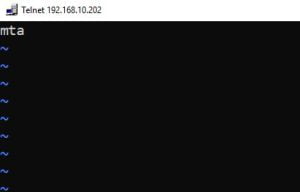
Press ” i ” for insert, after insert hostname press ” Esc ” and ” wq! ” to write the changes
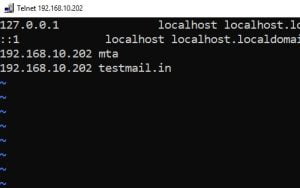
Now, add the FQDN for your server by following edit command and make it write
# sudo vi /etc/hosts
Reboot the system after changing hostname and FQDN.
3. Add the following Webmin yum repository by creating new webmin.repo file as follow
# sudo vi /etc/yum.repos.d/webmin.repo
Add the following repository and save the file
[Webmin]
name=Webmin Distribution Neutral #baseurl=https://download.webmin.com/download/yum
mirrorlist=https://download.webmin.com/download/yum/mirrorlist
enabled=1
4. Install the package signed GPG key
wget https://download.webmin.com/jcameron-key.asc

rpm --import jcameron-key.asc
5. Run the install command now
# sudo yum install webmin
Another Method to install Webmin
Run the below command to download the file
# sudo wget http://prdownloads.sourceforge.net/webadmin/webmin-1.930-1.noarch.rpm
Install the dependencies
# sudo yum -y install perl perl-Net-SSLeay openssl perl-IO-Tty perl-Encode-Detect
Now, run the command to install webmin
# sudo rpm -U webmin-1.930-1.noarch.rpm
Webmin is supportable with all Fedora, Redhat and older versions of Redhat, CentOS and all the distribution from Redhat or Fedora
6. Most Important thing is to add a Webmin port in Firewall to open
To check the firewall status follow the below command
# sudo systemctl status firewalld
If the firewall is Active and Running then add Webmin port ” 10000 ” in the firewall and reload the firewall
#  sudo firewall-cmd --permanent --add-port=10000/tcp

#  sudo firewall-cmd --reload
7. Now Access the Webmin into localhost by entering ” localhost:10000 ” or ” yourserver-ip-address:10000 ” into the browser.
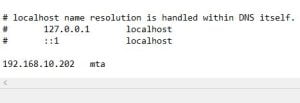
To Access Webmin from the windows system you would have to update hosts file first with the Administrator privileges. The hosts file location is ” c:\windows\system32\drivers\etc\hosts ” edit with notepad.
Open hosts file and add the following entry
yourserver-ipaddress yourserver-hostname
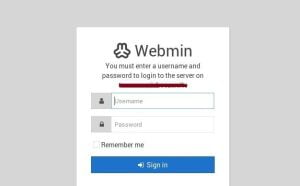
8. Finally, access the webmin from the hostname or ip address with port 10000, login with root user
192.168.10.202:10000
Video Tutorial
I hope you have understand above tutorial. I am requesting if you have any doubt please ask me by comment section about your queries.


Wow, amazing weblog layout! How lengthy have you ever been blogging
for? you made blogging glance easy. The total look
of your website is excellent, as neatly as the content!
Thank You.. after some practice, research I got this..
It’s an awesome post in support of all the internet viewers; they will obtain benefit
from it I am sure.
Thanks for finally talking about > How to Install Webmin on CentOS 7
Techsbucket < Loved it!
hmmm..share with others too..