SAR tool is a very helpful and amazing tool for Linux operating system. We use sar to generate, debug and analyze the Log files from the Linux operating system. This tool is openly available on the internet that can be downloaded and installed easily in our Linux Operating System through the command line. This can be used for real-time monitoring of your Linux server. Once sar is set up on the system, we will use sar command to see the output previously saved in a file. The default path of the saved file would be /var/log/sa/saXX ordered by day and the month.
Steps to Install SAR on RedHat 8
SAR stands for System Activity Report. Sar is a very popular utility used to check Memory, CPU, system load, network, and swap space utilization on the Linux operating system. As per sar, it uses a proc file system to collect the information. To achieve sar in your Linux machine, update your system first and then install sysstat package using apt-get / yum command by sudo rights.
Step 1
Update your RedHat Linux machine using the following command by sudo rights. The update may take longer if you did not update the system for long.
# sudo dnf update -y
Step 2
Now, install sysstat on your Linux machine.
Before proceeding, check the sysstat package exist or not.
# rpm -qa | grep sysstat
![]()
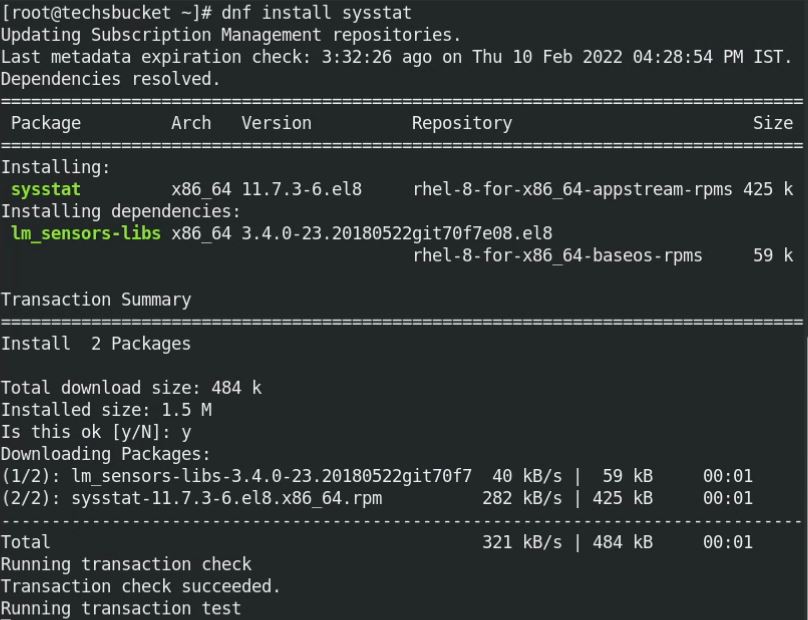
If the package does not exist, install sysstat with the below command
# sudo dnf install sysstat
Step 3
Verify the sar version and sar query
# sudo sar -V

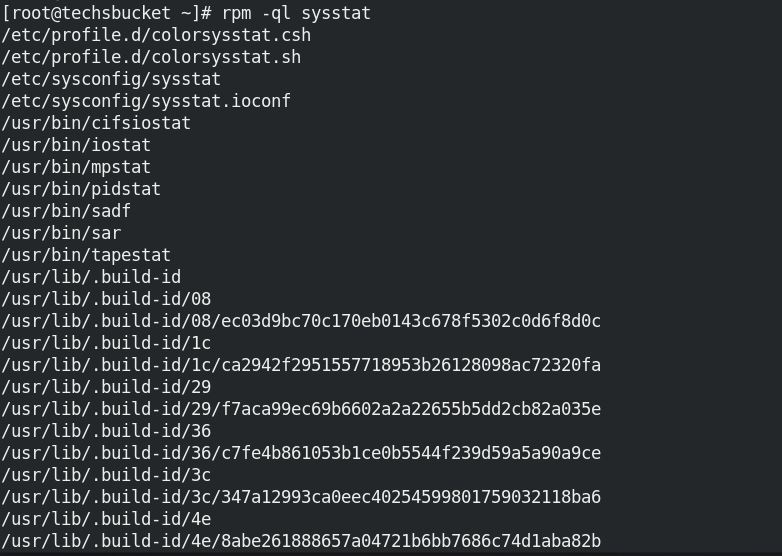
# rpm -ql sysstat

Step 4
Check the cron job to collect daily reports. This will be a default entry after sysstats installation but we should verify the cronjob for sar. We can use /vi/gedit/nano any editor to see and modify the details.
# sudo vi /etc/cron.d/sysstat
If you don’t see cronjob exist for sar in cron file then you can simply add the given cronjob details.
# run system activity accounting tool every 10 minutes
*/10 * * * * root /usr/lib64/sa/sa1 1 1
# generate a daily summary of process accounting at 23:53
53 23 * * * root /usr/lib64/sa/sa2 -A

Step 5
Create sysstat file under /etc/default/sysstat directory and add ENABLED=”true”
# sudo vi /etc/default/sysstat
![]()
Step 6
Finally, restart the sysstat service.
# sudo systemctl restart sysstat
Step 7
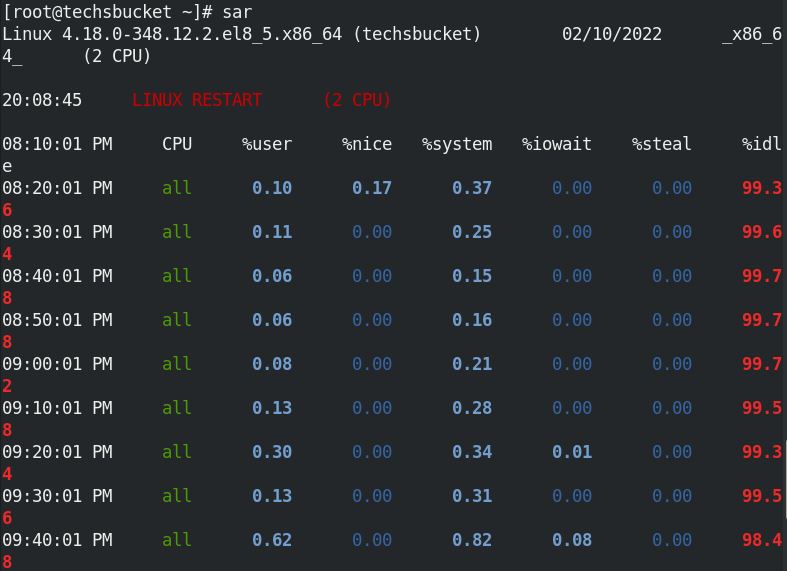
We have successfully installed sar in the Linux machine. Now, it’s time to check the real-time reports by the sar command. We can only write a syntax “sar” without any argument on the terminal windows, that will show the real-time output for any activity running on the Linux machine using the count and interval parameter.
# sudo sar

Step 8
In this step, we will run the sar command along with the arguments.
| sar -u | CPU utilization report |
| sar -P ALL | Invalid CPU report |
| sar -r | Memory and Swap usage |
| sar -n DEV | Statistics for Network utilization |
| sar -c | Number of processes created per second |
| sar -q | Average Reports |
| sar -f /var/log/sa/filename | sar reports from file for a specific date |
We can see some real-time outputs for CPU, Memory, Network by the count. Here is a sample for sar with arguments.
# sudo sar -u 2 5
Real-time report for every 2 seconds and 5 counts with an Average of all.

# sudo sar -r 2 4
Memory as well as swap space utilization, 4 outputs, and interval of 2 seconds.

# sudo sar -n DEV 1 1
Statistics for Network Utilization.

There are more sar arguments commands are used in a real production environment. In this post we have covered how can we monitor our RedHat Linux server using sar utility. I have shown some popular arguments with sar command which you can use in your Linux system.
Also Read : Install Nagios monitoring tool on Ubuntu 20.04
Also Read : Install MySQL And WordPress With Docker Compose YML
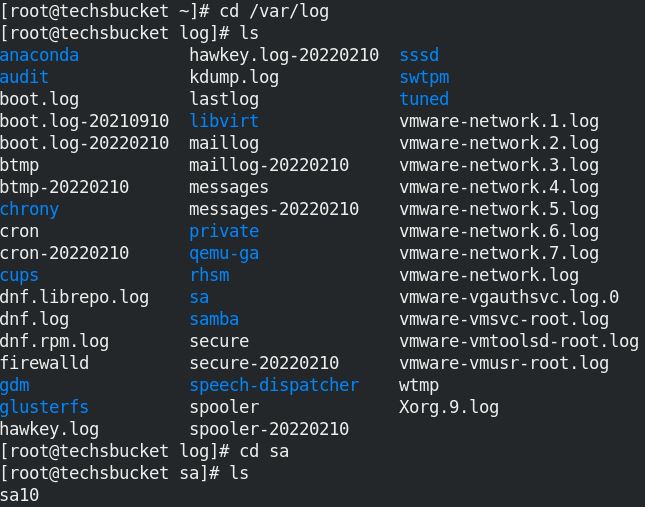
SAR log file you will find under /var/log/sa. As you can see sa10 log file is created on my RedHat machine.

Video Tutorial
That’s all, in this post we have covered how can we install sysstats and use sar command along with multiple arguments. I have given very simple steps to install sysstats sar on the RedHat 8 operating system. Comment below or contact me if anyone is stuck during sar installation on any version of the Linux operating system. Don’t forget to watch the video and share this post with your colleagues.


