In this post, we are going to look at the Docker Compose YML file. We will see how can we create a YML file, versioning. We will mention MySQL and WordPress code in the docker-compose.yml file and install both the containers using this file. Docker-compose YML file is basically Docker Composer formatted file which describes solutions for
Containers : Like, how many containers are to be run in this particular docker as a single service
Networks : It will also support a network, you can define your network configuration for docker containers
Volumes : You can also assign a volumes
Docker Compose YML file is the combination of Containers, Networks, and Volumes. So, we will see how can we create a YML file, and with the help of the YML file how can we start the containers as a single service. Before this, we will discuss the component level of the docker file.
In this post, we are going to create a docker-compose YML file and we will install and run MySQL and WordPress containers with docker-compose YML file.
Docker Compose YML File
1. The first thing about the YML is that the YML file can be Versioned which could be version 1, version 2 or version 3. In the tutorial, we are going to use YML Version 3.
2. Version statement should be the first line of the YML File
3. YML file can be used with the docker-compose command. If you want to execute your YML file then you will have to use the docker-compose command.
4. The default file name would be in docker-compose is docker-compose.yml. The default file name can be changed with the ” docker-compose -f” command. For example, docker-compose -f myfile.yml
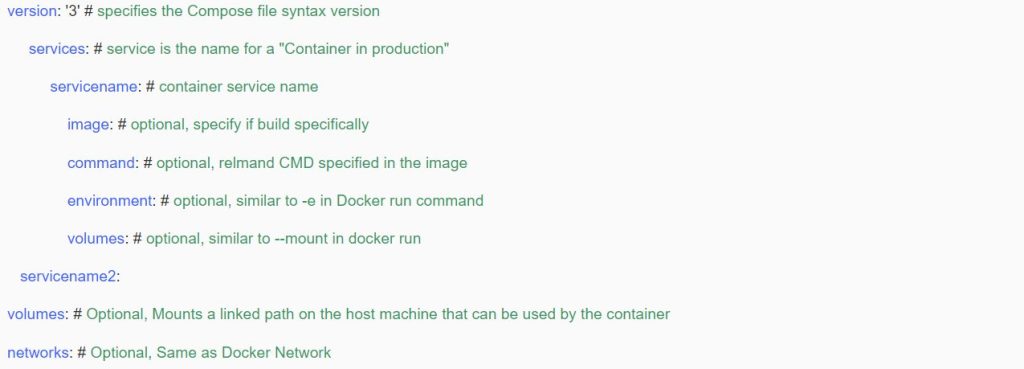
So let’s see the component level of the YML file. Below is the sample generated YML file which has some tables
We will see how we can execute the container with the help of docker-compose. Let’s see, how can we start MySQL and WordPress with the Help of docker-compose YML file.
- Docker Compose : Starting MySQL and WordPress containers
- We will prepare a docker-compose file
- We will start these containers with docker-compose.yml file
- We will verify the containers on the Host machine
- Access WordPress in Web Browser
Steps to install MySQL and WordPress using docker-compose.yml
Download and install Visual Studio Code to create docker-compose.yml. You can use any text editor which is available on your machine. In my case, I am using Visual Studio Code.
Before proceeding, you need to have installed first Docker and Docker Compose in your Linux Machine
Step 1
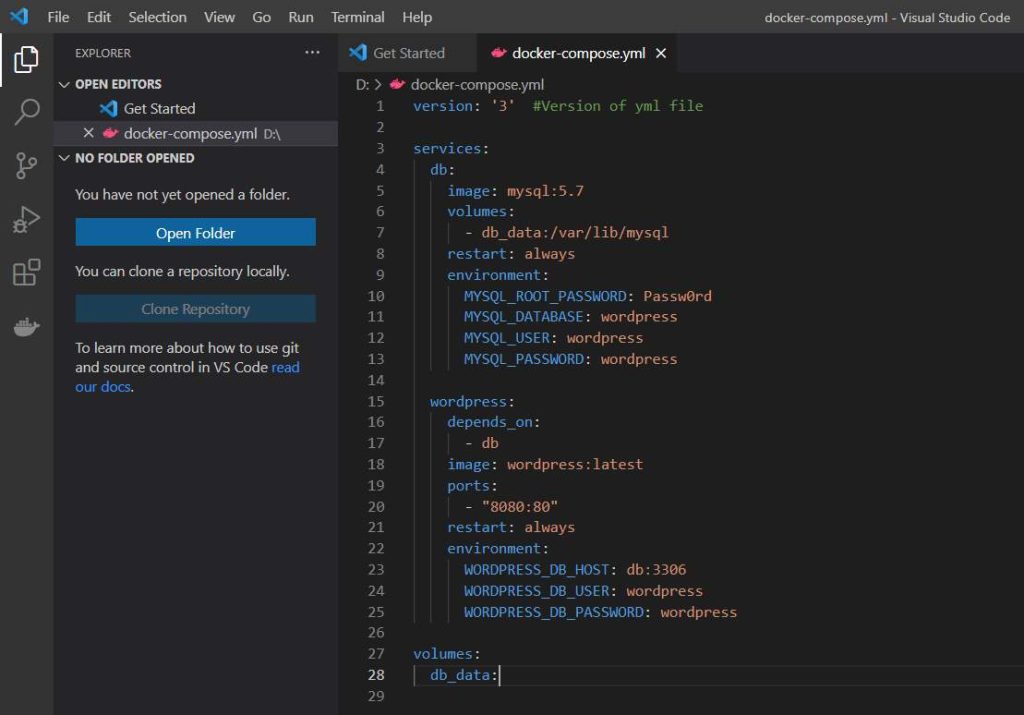
Open Visual Studio and create a new project and type the following that will be used in the docker-compose.yml file
Download docker-compose yml file code from here
Step 2
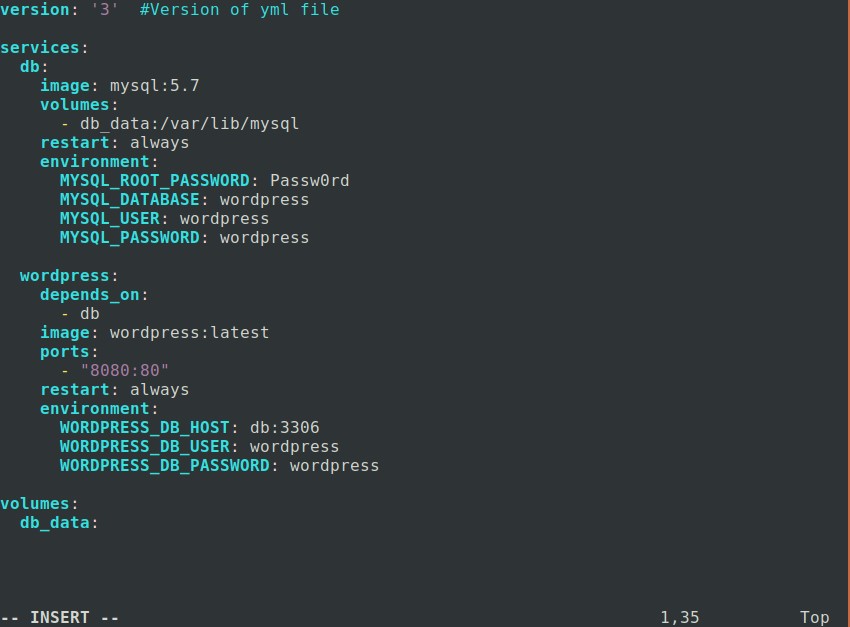
Login to your Linux machine and create a docker-compose.yml file simply using a touch command and paste all the values from the Visual Studio as per the above image
# sudo touch docker-compose.yml

# sudo vi docker-compose.yml
Now, copy and paste all the value as it is from the Visual Studio and save the docker-compose.yml file using wq.
Step 3
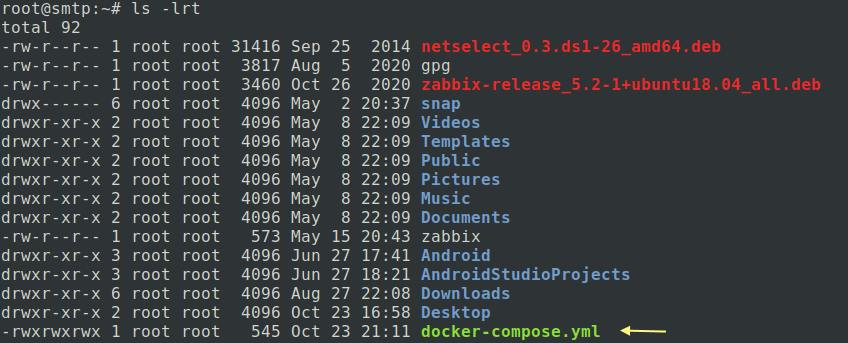
Provide Executable permission to the docker-compose.yml file
# sudo chmod 777 docker-compose.yml
Check the file for executable permission using
# sudo ls -lrt
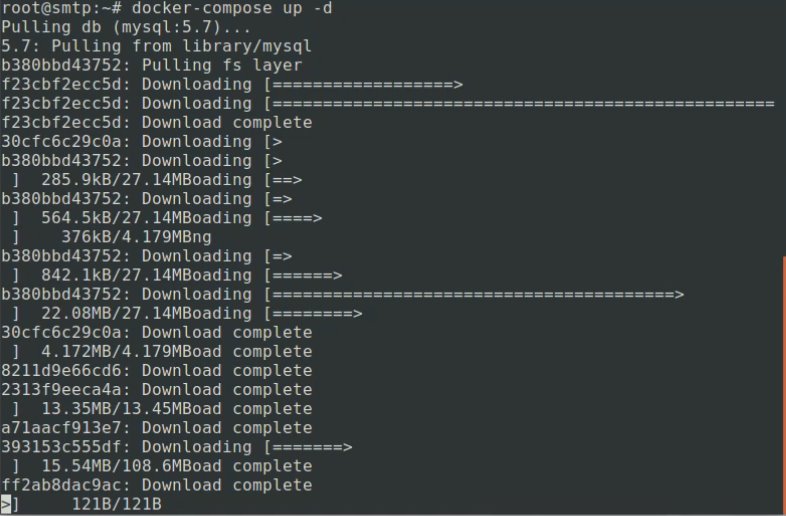
Step 4
The final step is to install containers MySQL and WordPress which we have mentioned in the docker-compose.yml file.
# sudo docker-compose up -d
Step 5
Once containers are installed, cross verify with the docker ps command that will show you the details of installed containers.
# docker ps

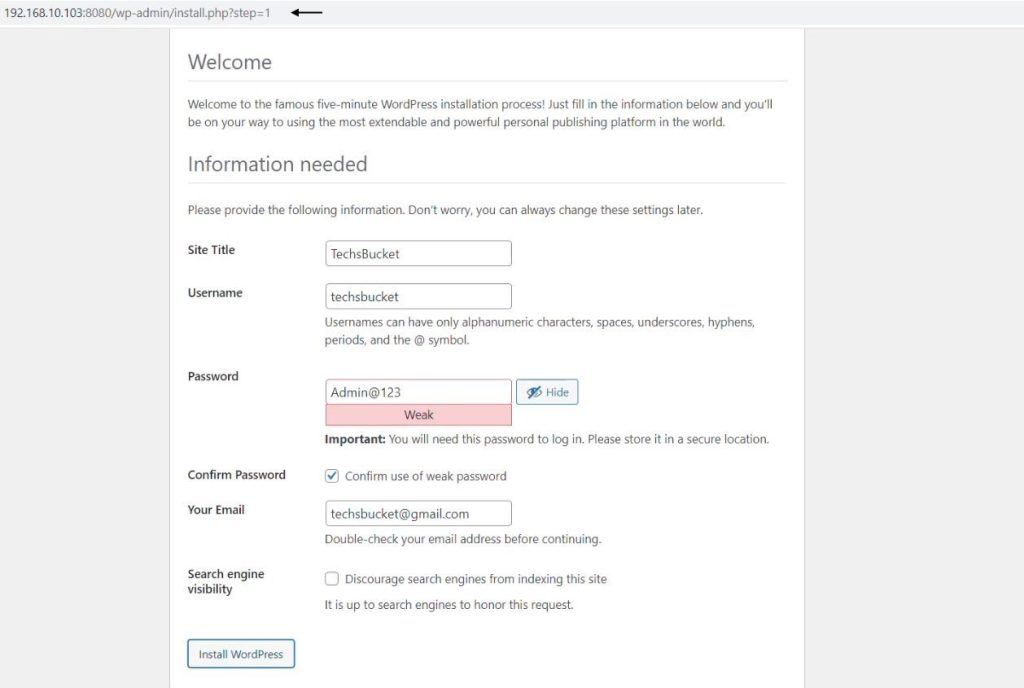
Step 6
The next step is to check WordPress which we have installed using the docker-compose.yml file. Open your web browser on the localhost machine and put your Docker systems IP address with port 8080 which we have mentioned in the docker-compose.yml file. My Docker machine IP address is 192.168.10.103 so my URL will be 192.168.10.103:8080/wordpress
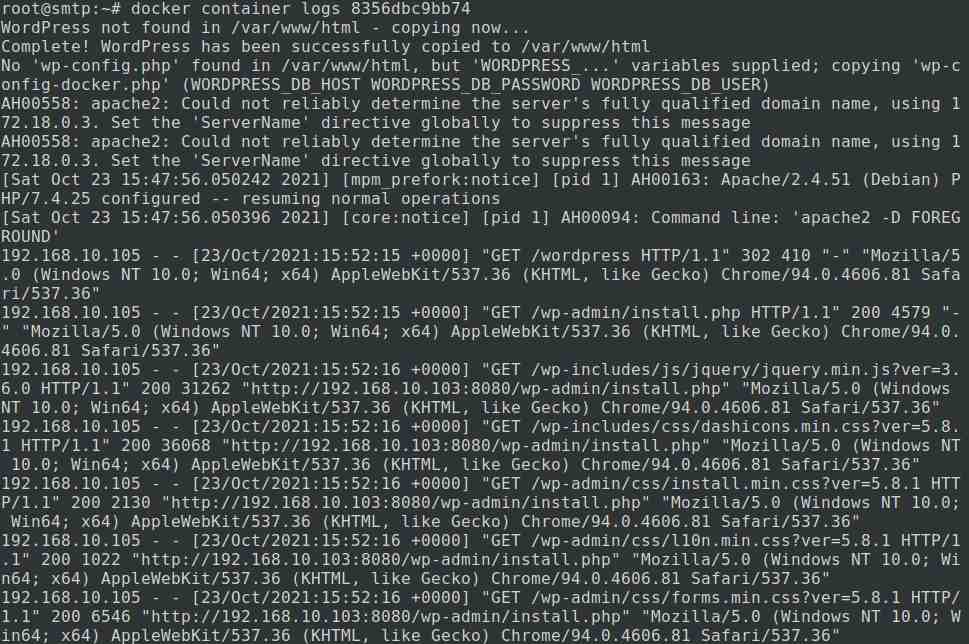
We have successfully installed MySQL and WordPress containers with the docker-compose.yml file. We can also check container logs with the docker containers id.
# sudo docker ps

With the help of the docker ps command, we found the running container id. We can check container logs with the help of docker container id. We are checking WordPress logs with container id ” 8356dbc9bb74 “
# sudo docker container logs 8356dbc9bb74
Also Read : How to Install Docker
Also Read : How to Install Docker Compose
Video Tutorial
In this post we have covered, how to create the docker-compose.yml file and with the help of yml file how can we install multiple containers with a single command. We have also covered WordPress installation that was working fine with no issues. So, I have just tried to show you the very simple way to achieve docker container installation very smoothly. Comment below or Contact me if you still have any Query or Suggestion related to the post, share with friends/colleagues too. Thank You. . .