Table of Contents
In this tutorial, we are going to learn how to build your own file sharing system or file sharing website using your own VPS or cPanel web hosting. How do we do that? we have some easy steps and ready freely available and genuine scripts to build a file sharing website.
If you are a beginner still you can build your own file sharing website. You can simply follow the steps and achieve this so there is no need to be very professional to build a file sharing website. To build your own file sharing website you will require web hosting or VPS access to upload the scripts into the public_html directory, for VPS upload in www/html directory.
Steps to building a file sharing Website
Before we begin, download the ProjectSend script from its official website. Once the download is complete, we will upload this script to the www/html folder. I am using Ubuntu 18.04 localhost to demonstrate how to build up the file sharing website.
- ProjectSend is free and open-source software that lets you upload files and later you can share these files over the Internet.
- It is a self-assured application, which means that you can install it on your own VPS or Web hosting.
- It is a free, secure, and user friendly file sharing software.
Step 1
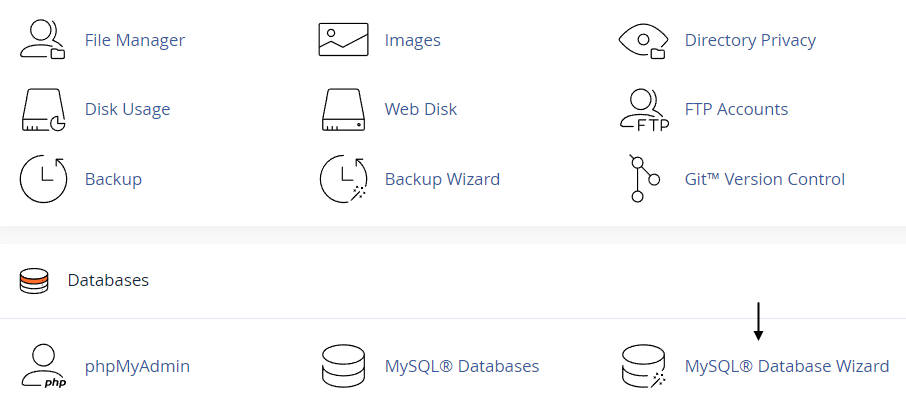
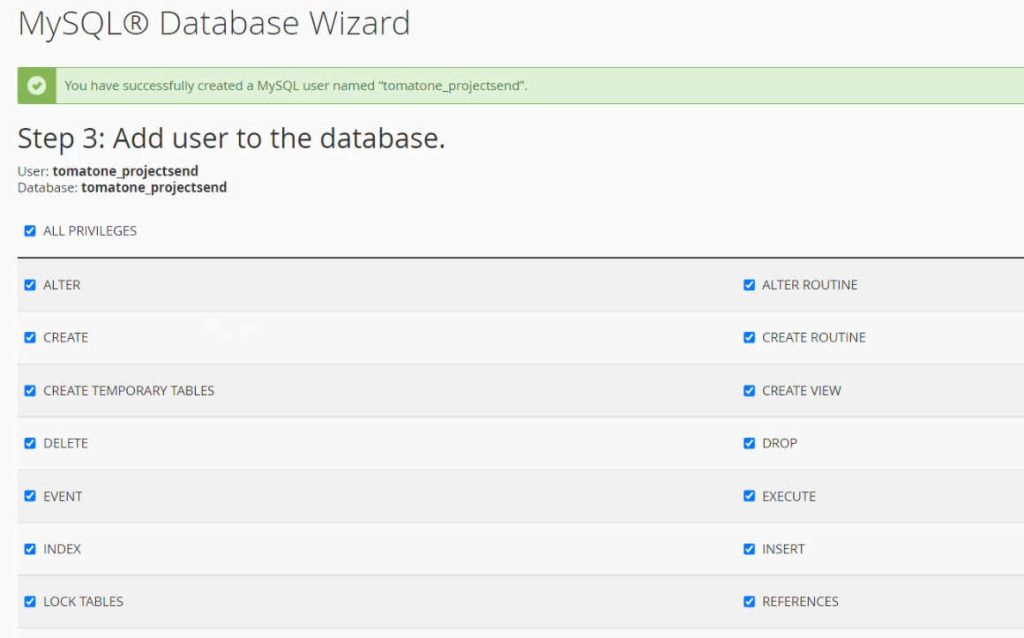
Login to your cPanel create Database and Database user then give full permission. This database and database user will be used for ProjectSend while setting up file sharing website.
Step 2
Upload and extract the downloaded ProjectSend scripts inside the public/html directory. Once the extract has been done, you can delete the .zip file anytime. You can simply upload any files using sftp. You can create a subfolder and extract the scripts inside the subfolder, your URL will be changed to “www.yourdomain.com/yoursubfoldername“.

Step 3
Go to any browser and type your website URL. ProjectSend file sharing installation setup will start.
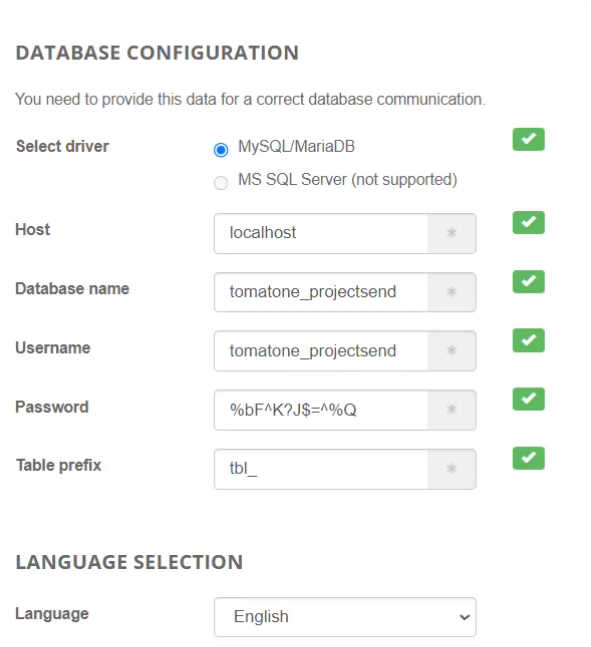
Fill out the details as per the following. After filling in all the details, go down and click write a config file.
- Host: localhost
- Database name: Database you created
- Username: Database username you created
- Password: Password when you have created the Database user
- Table prefix: tbl_ (Default) does not change
Step 4
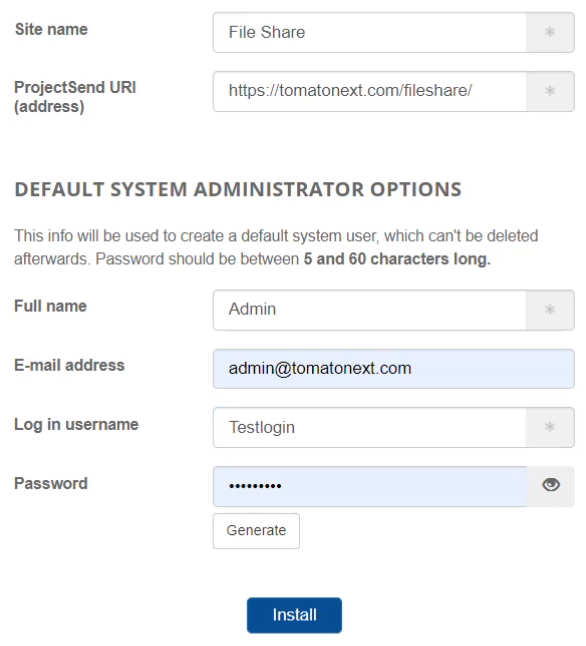
Click on continue installation and fill in all the basic details like website site name and email address. Do not change the project URL here and click install.
Step 5
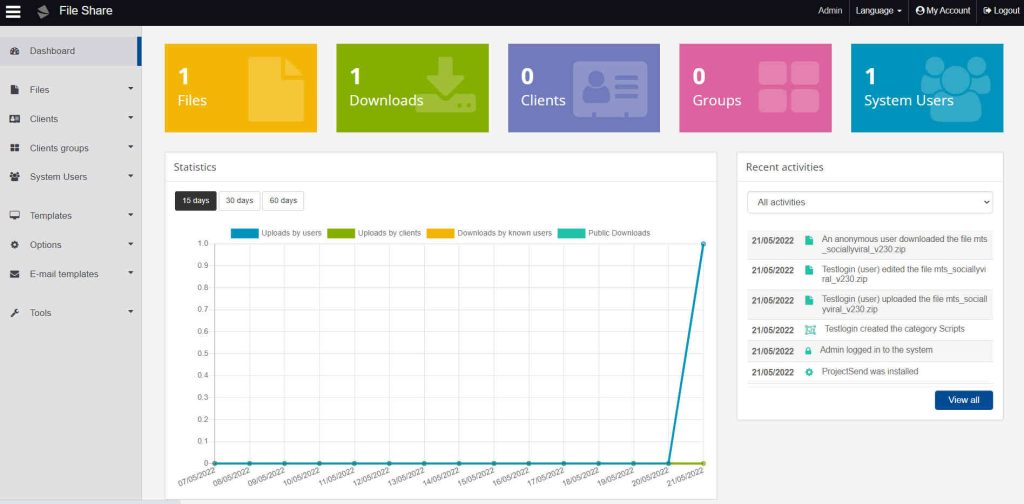
Login to your dashboard to customize your website. In this dashboard, you can manage files, clients, themes and so many things you can do here.
Step 6
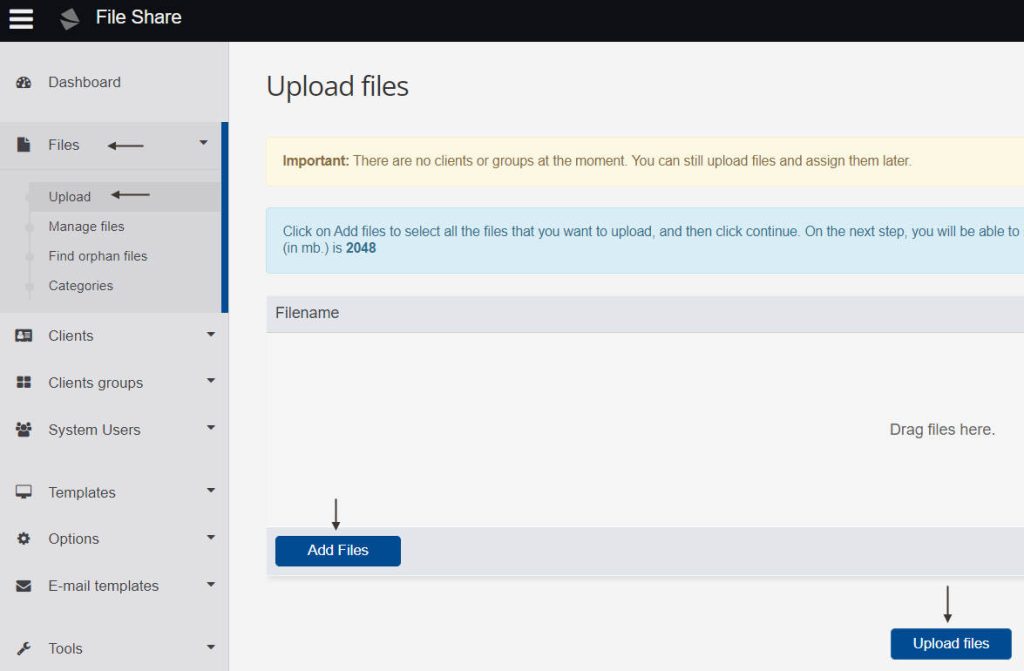
To upload files, expand files the click on upload. Now, you can upload any files by clicking on Add Files or we can drag any files to this window to upload.
Step 7
In this step, we will see how to share the link for the uploaded file. Go to edit the file and click on the Public button.
File — Manage files — Edit — Save — Public
Also Read : How to enable BitLocker on Windows

Step 8
You will see a public URL like below and this link will be your file download link that you have uploaded. This link you can share publicly to download your file.
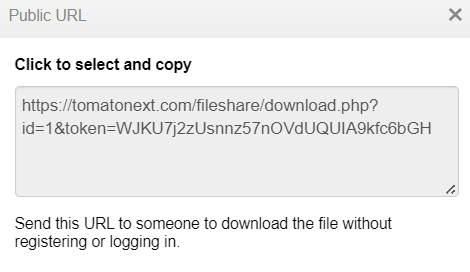
Remember, each file will consume disk space that you upload to the server. Make sure you have good disk space web hosting I will advise you to take an unlimited disk plan for file sharing websites.
Also Read : How to install Webmin on Ubuntu 18.04 – 20.04
Video Tutorial
In this tutorial, we have learned, how to build your own file sharing website. If you have any queries you can contact me via the contact page or simply you can comment below your queries.