BitLocker is an inbuilt feature from Windows vista which secures your hard drive by an encryption key or password. In this post, we are going to learn how to make secure your hard drive by applying BitLocker to it.
What is BitLocker?
BitLocker has implemented with the Microsoft Windows version from Windows Vista on 30th Jan 2007. BitLocker is the full volume protection feature, we can apply a password on the hard disk to protect the data. Once you implemented BitLocker, your volume will be encrypted and cannot be accessed without a correct password which was implemented with the BitLocker feature.
Steps to implement BitLocker
We are going to learn steps to apply passwords on a hard disk to protect the data. In the following steps, we will learn how to apply passwords on the root partition of the windows i.e “C” drive. This will encrypt your “C” drive and ask for your BitLocker password on the computer startup to unlock.
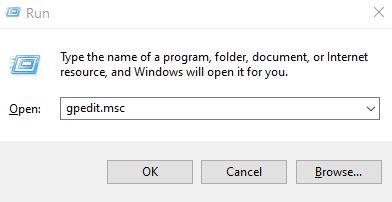
Step 1
Go to start then search and open “Edit group policy” or simply type “gpedit.msc” in the run.
Step 2
In this Local Group Policy Editor window,
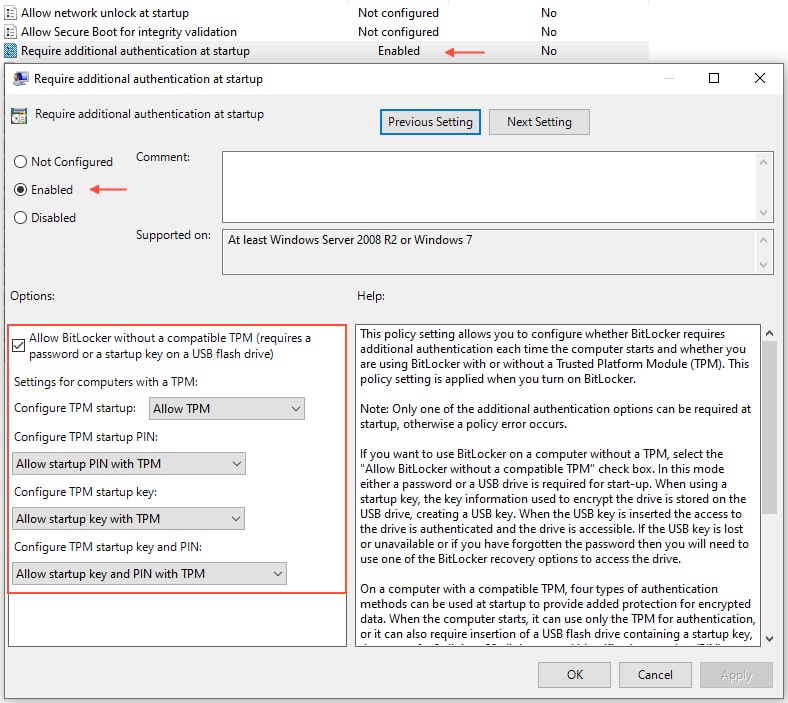
Expand : Computer Configuration\Administrative Templates\Windows Components\BitLocker Drive Encryption\Operating System Devices
Find and enable “Require additional authentication at startup“
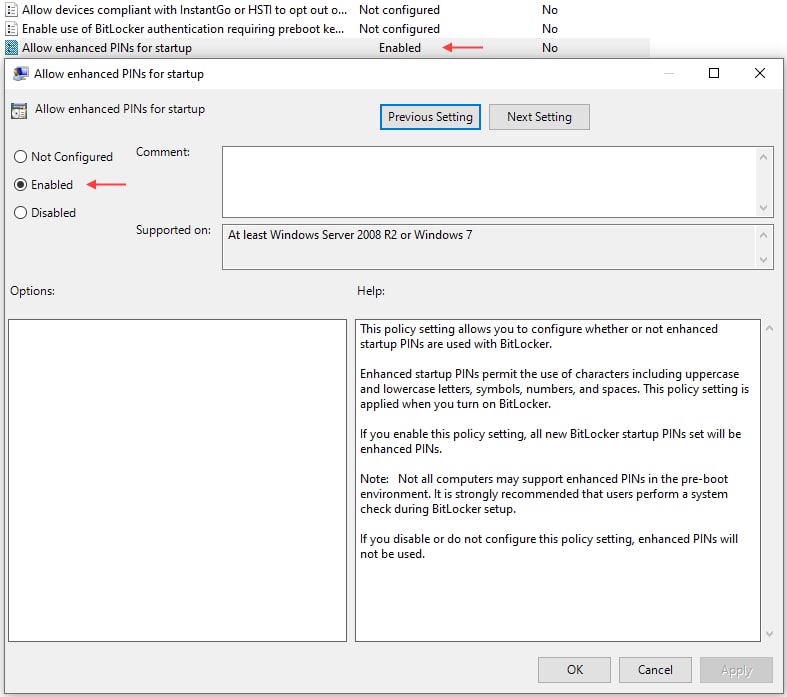
Step 4
In the same section, enable the “Allow enhanced PINs for startup”
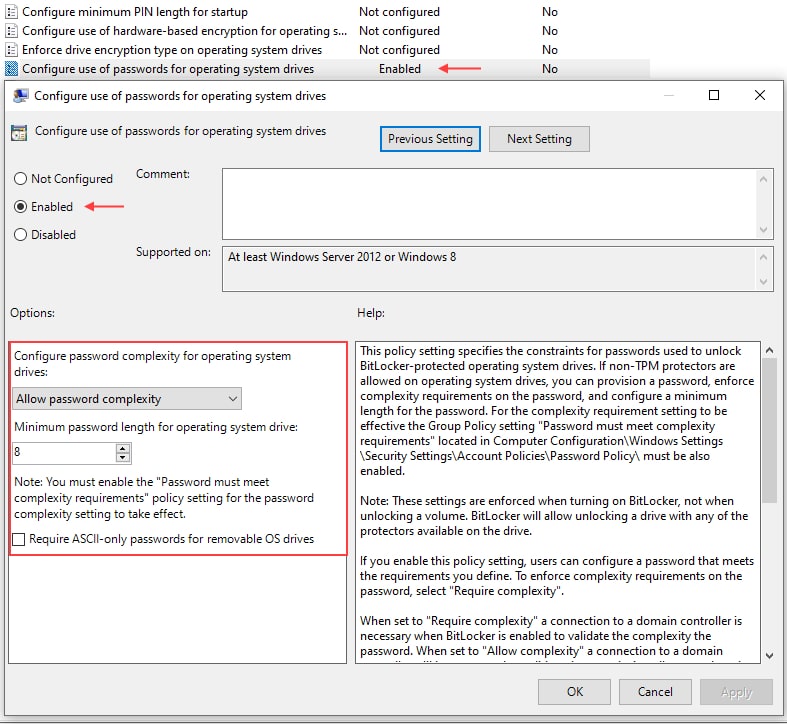
Step 5
In the same section, find and enable the “Configure use of passwords for operating system drives”
Step 6
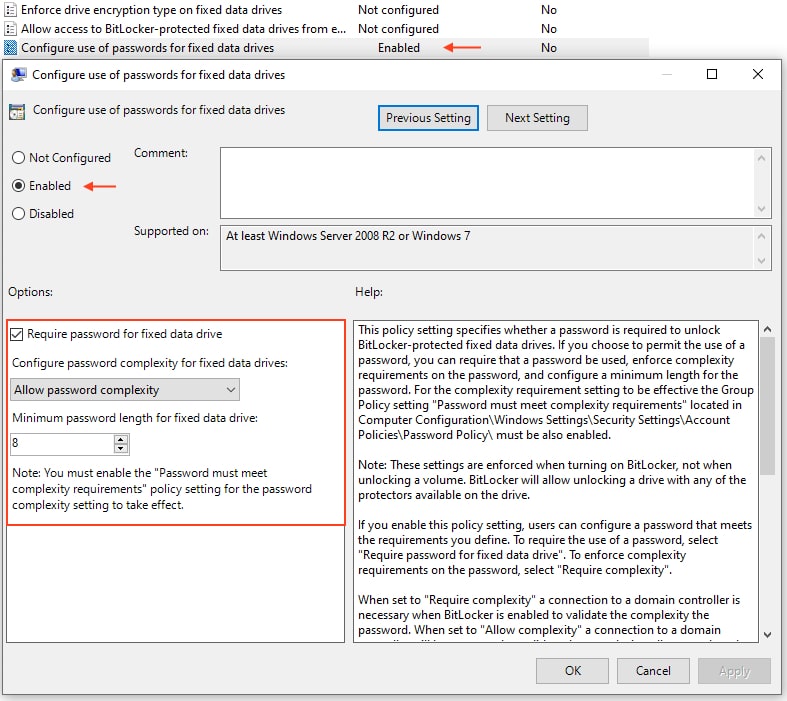
Now, Expand : Computer Configuration\Administrative Templates\Windows Components\BitLocker Drive Encryption\Fixed Data Drives
Find and enable the “Configure use of passwords for fixed data drives” We can change the minimum password length.
Steps to Enable BitLocker
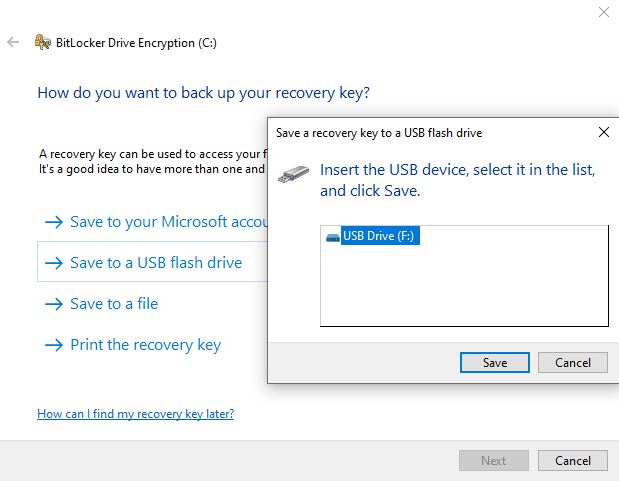
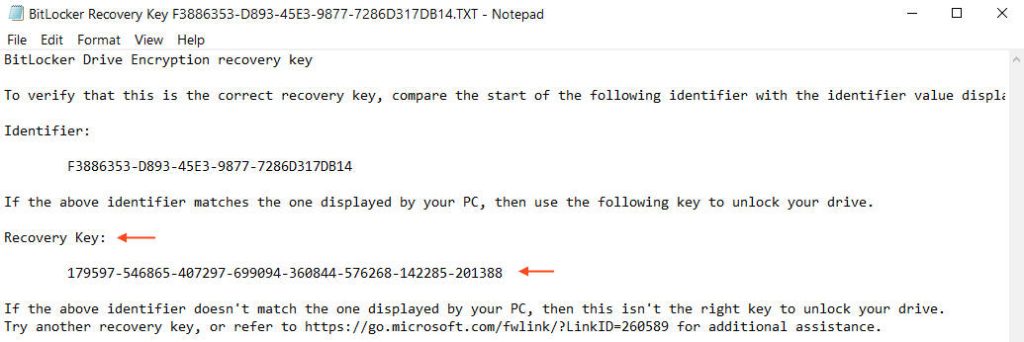
Before enabling BitLocker, insert the USB drive to save the BitLocker Recovery Key. This key is very useful and important in case you forgot your BitLocker password.
Step 1
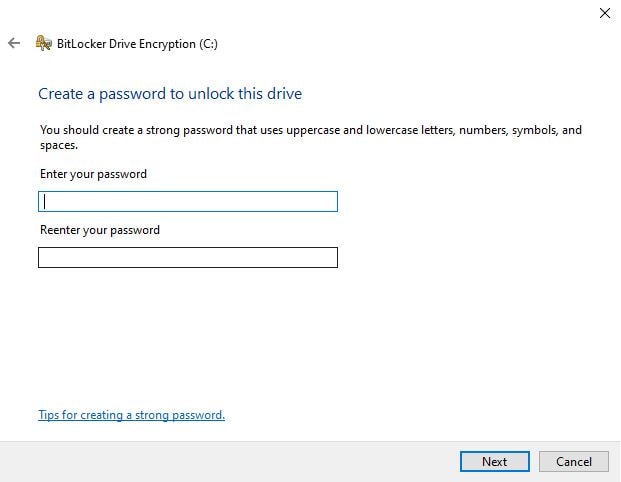
Once you attached the USB drive, right-click on your OS drive and select the “Turn on BitLocker” option then click on Enter a password. Put any strong password as per the minimum password length we set in the previous step.
Step 2
Click “Save to a USB flash drive” to save the BitLocker recovery key. This key will be used in case you forgot your BitLocker password.
Step 4
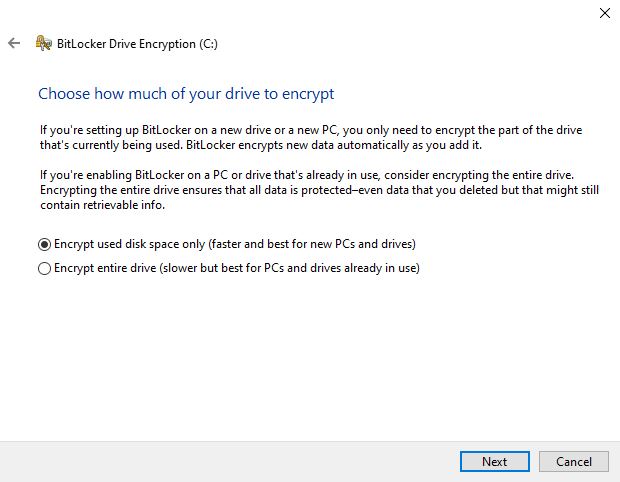
Keep the default encryption mode, do not change anything here, and click on the next two times.
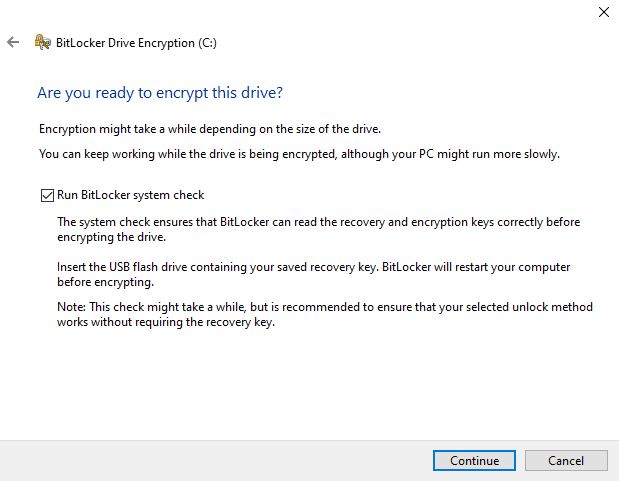
Step 5
Check on ” Run BitLocker system check” and hit continue.
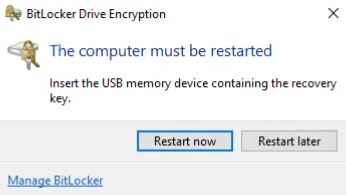
Step 6
The final step is to reboot the system. A reboot popup will come once the BitLocker process is completed.
Step 7
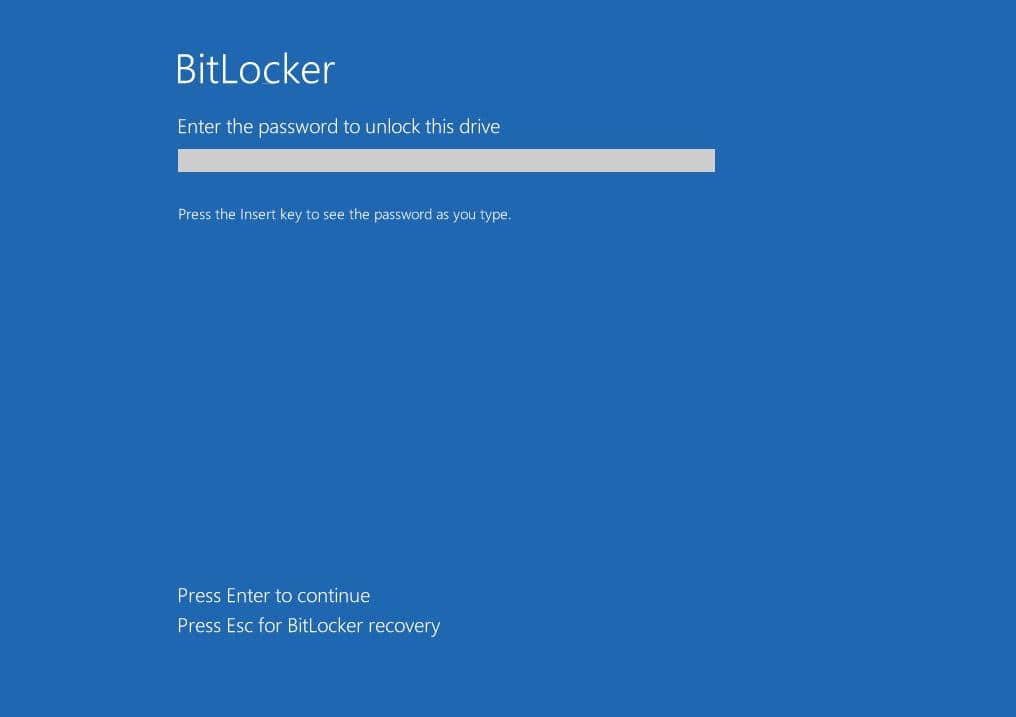
BitLocker is enabled now. Every time Windows boots, you will ask to enter your BitLocker password otherwise windows will not boot.
BitLocker Recovery Guide
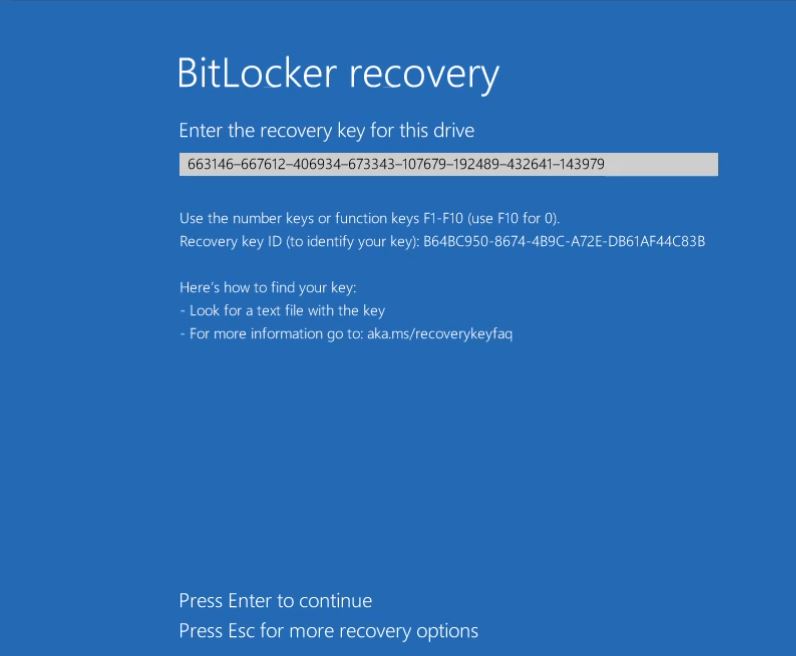
If you have forgotten your BitLocker password, still you can access your Windows system with the BitLocker Recovery Key. In this tutorial, we have seen how to save the BitLocker Recovery key into a USB drive.
Step 1
If you have saved BitLocker Recovery Key in your USB drive during BitLocker setup then insert this USB into another machine and open your saved BitLocker text file.
Step 2
Once the system boots, you will see a BitLocker screen. On this screen press the “Esc” button two times then enter your BitLocker Recovery Key and hit Enter.
How to Turn Off BitLocker?
If you are not interested in BitLocker, you can simply turn off the BitLocker for each drive. To turn off the BitLocker.
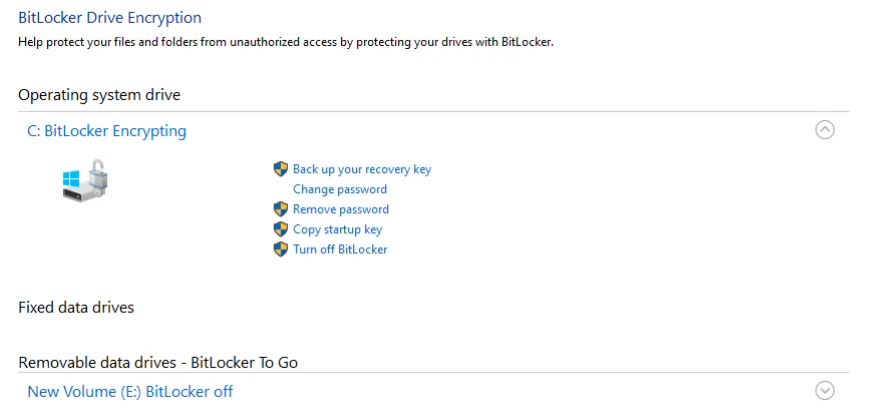
Right-Click on BitLocker enabled drive and go to “Manage BitLocker” and simply click on “Turn off Bitlocker” and reboot the system.
Note : Do not forget to save your BitLocker Recovery Key on any External device. If you do not have BitLocker Recovery Key saved then you will not be able to start your Windows system in case you forgot your password.
Alos Read : How to track memory leaks and create dump
Also Read : How to install cPanel on AlmaLinux 8
Video Tutorial
That’s all, in this tutorial we have covered how to Enable BitLocker on Windows operating system. We have seen how to use BitLocker Recovery Keys to boot the system and finally covered how to turn off the BitLocker step by step. If you have any query do not hesitate to ask me by comment of through the contact.