
Today in this post we will learn about BIND and its installation and configuration. This post have BIND Tutorial with Video and steps with picture which makes this post very easy to learn. Lets learn something about BIND and its installation and configuration on CentOS 7
BIND is very important thing to do before setting up the SMTP server for Bulk Emailing, Before proceeding BIND in local server, most important step is to make PTR ( Point Domain to IP ) entry first from your ISP’s end. lets read something about BIND DNS.
What is BIND ?
BIND stands for Berkely Internet Name Domain which helps to translate your IP address to Domain name and vice versa. Usually this mechanism you will find in linux servers, BIND DNS has several zones, but in this post I am going to share with you the most important zones to configure before bulk emailing which plays most important role to prevent your Domain and IP address from blacklist during the bulk emailing.
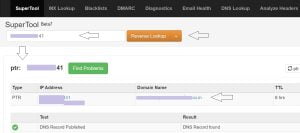
To confirm PTR entry visit following website and check by putting your IP address which should point to your Fully Qualified Domain Name. If it is reflecting then wait 24 to 48 hours before start emailing or do contact your ISP asap. This website shows the blacklisting status also for your IP address
https://mxtoolbox.com/ReverseLookup.aspx
A. Steps to setup BIND
1. Update your system before installing BIND
#  sudo yum update

#  sudo yum install bind
2. You can configure BIND easily using Webmin
Open webmin page by putting your ip address or FQDN with webmin port in your web browser
192.168.10.202:10000
Login with root user
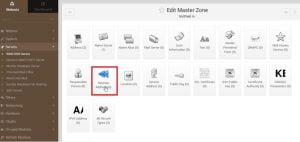
Expand Servers category to find and configure BIND DNS, if BIND DNS is not listed in Servers category then you should find in Un-used Modules category.
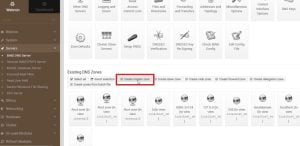
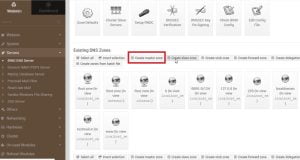
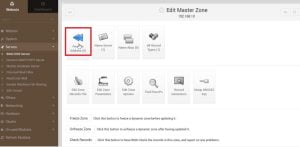
Go to BIND DNS server you will see the following screen, scroll down and find create master zone.
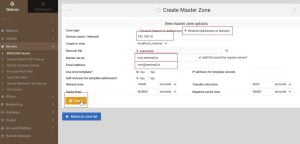
B. Create Forward Address Record
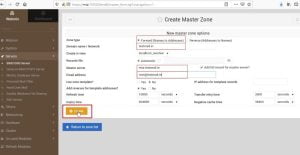
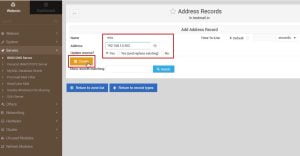
1. Go to create master zone and make sure you have selected Forward ( Name to Address )
2. Fill it with your Domain name, FQDN and email address as per following
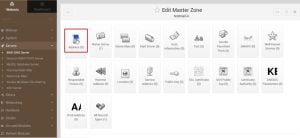
3. Now, there will be screen for edit master zone, select Address from this windows and put your host name, domain name followed by your IP address as per following. There would be two entries, one for host name and another entry for your domain name.
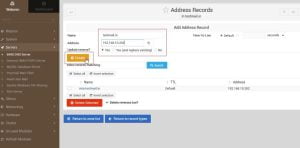
4. After updating records click on return record type because we will have to update the reverse records for the same
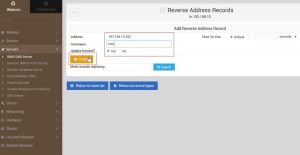
5. Now, Go to Reverse Address
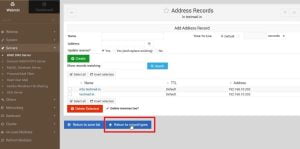
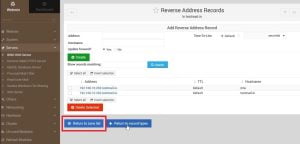
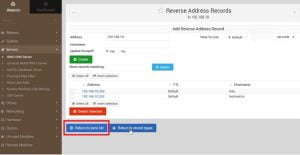
6. In this record we will have to enter IP address first then host name and domain name
7. This will look like the following after configuration of Reverse Address. Now click on Return to zone list to create master reverse address record
C. Create Reverse Address Record
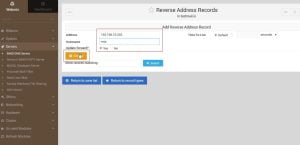
1. Go to create the master zone and make sure you have selected Reverse ( Address to Name ) and fill the details. In my case I am using a class C IP address, therefore my IP address for the reverse record is 192.168.10, identify the class of your IP address then go-ahead
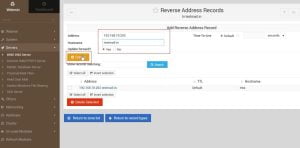
2. After updating details click on create, you will see the following screen. Go to Reverse Address and update the details of your ip address and domain
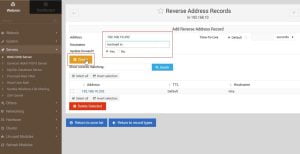
3. Once update, these entries will look like the following, go back to the zone list
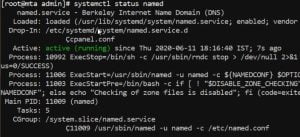
D. Check BIND service
# sudo systemctl status named
E. Final step to start and enable BIND on boot
#  sudo systemctl start named

#  sudo systemctl enable named
Video Tutorial
In this post I have covered, how to configure master zones, Forward zone and Reverse zone. Once you configured these zones then wait for 24 to 48 hours to update it globally which is very important to make secure from blacklisting of your IP and Domain. Hope you have followed all the steps from this post, if you have any query then ask me from contact section or comment below.


Hmm it looks like your website ate my first comment (it was super long)
so I guess I’ll just sum it up what I wrote and say, I’m thoroughly
enjoying your blog. I as well am an aspiring blog writer but I’m
still new to the whole thing. Do you have any tips for rookie blog writers?
I’d definitely appreciate it.
Attractive component of content. I simply stumbled upon your
weblog and in accession capital to say that I get in fact enjoyed account your blog posts.
Any way I will be subscribing on your feeds or
even I fulfillment you access constantly rapidly.
You’ve made some good points there. I looked on the web to learn more about
the issue and found most individuals will go along with your views on this site.