For enthusiasts and professionals in the realm of data science, machine learning, and large-scale data processing, Anaconda Python Distribution stands as a beacon of convenience and efficiency. Boasting simplified package management and deployment, Anaconda offers a seamless experience for users across Windows, Linux, and macOS platforms.
In this tutorial, we’ll walk you through the steps to install Anaconda on Ubuntu 22.04, unlocking a world of possibilities for scientific computing.
Understanding Anaconda: Before delving into the installation process, let’s take a moment to understand what Anaconda brings to the table. Developed and maintained by Anaconda, Inc., this distribution of the Python and R programming languages is tailored specifically for data science applications. Whether you’re diving into predictive analytics, machine learning algorithms, or large-scale data processing, Anaconda provides the tools you need to succeed.
Versions and Editions: Anaconda comes in various flavors to cater to different needs. The Anaconda Distribution, also known as Anaconda Individual Edition, is the flagship offering, providing a comprehensive suite of data-science packages. Meanwhile, Anaconda Team Edition and Anaconda Enterprise Edition target more specialized use cases, albeit at a cost.
Installation Steps: Let’s dive into the installation process.
Step 1
Preparation Before we begin, ensure your system is ready to accommodate Anaconda. If you plan to use Anaconda Navigator GUI, install the necessary libraries and packages by running the following command.
# sudo apt install libgl1-mesa-glx libxss1 libxcursor1 libxi6 libxtst6 libegl1-mesa libxcomposite1 libasound2 libxrandr2 libxrandr2 -y
Step 2
Download Anaconda Navigate to the Anaconda Downloads page to check for the latest version available. At the time of writing, version 2020.05 is the latest stable release. Use the following command to download the installation script.
wget -P /tmp https://repo.anaconda.com/archive/Anaconda3-2020.05-Linux-x86_64.sh
Step 3
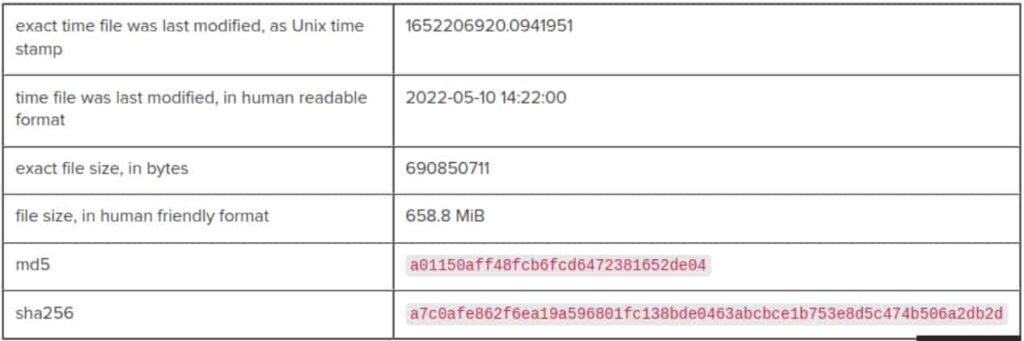
Verify Integrity Ensure the integrity of the downloaded script by verifying its checksum. Use the following command to display the script checksum.
sha256sum /tmp/Anaconda3-2020.05-Linux-x86_64.sh

Compare the hash displayed with the one available on the Anaconda website for your specific version to ensure authenticity.
Step 4
Installation Process Now that we have the Anaconda installation script downloaded, let’s kick off the installation process. Run the following command in your terminal.
bash /tmp/Anaconda3-2020.05-Linux-x86_64.sh
Press ENTER to continue.
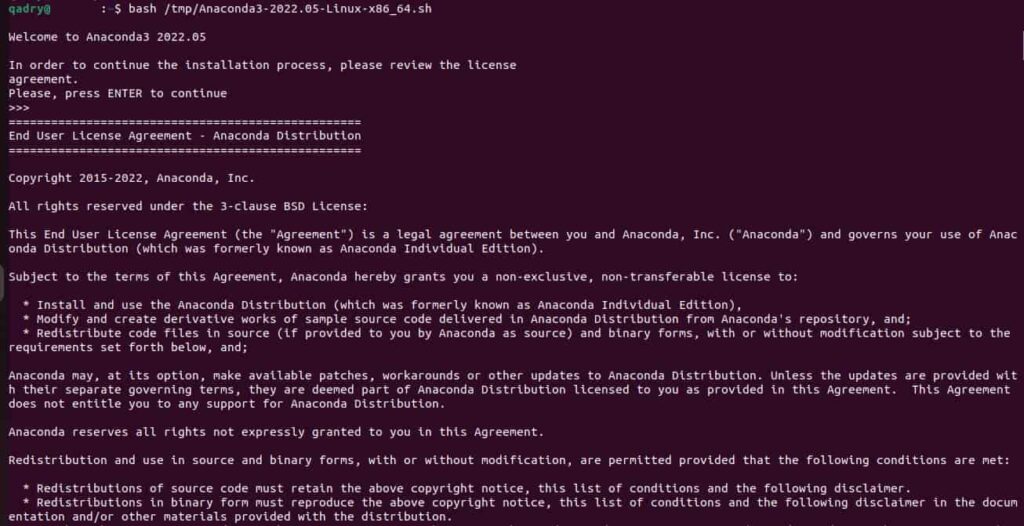
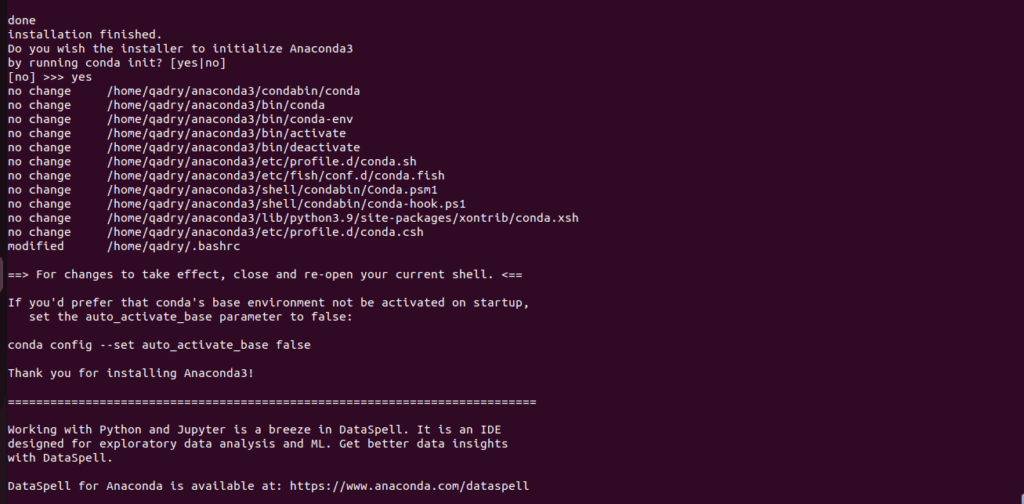
License Approval During the installation, you’ll be prompted to review and accept the license terms. Type ‘yes’ and press ENTER to proceed. Additionally, when prompted to accept the default installation location, simply press ENTER again.

Including accepting the license agreement and specifying the installation location.
Step 5
Post-Installation Configuration Once the installation is complete, you may need to update your system’s PATH variable to include Anaconda’s binaries. You can do this by running.
source ~/.bashrc

Step 6
Verification To verify that Anaconda has been successfully installed, you can run the following command to check the version.
conda --version
If everything is set up correctly, you should see the version of Anaconda displayed in the terminal.
Step 7
Launching Anaconda Navigator GUI For those installing Anaconda on a Desktop system, you can open the Navigator GUI by entering the following command in your terminal.
anaconda-navigator
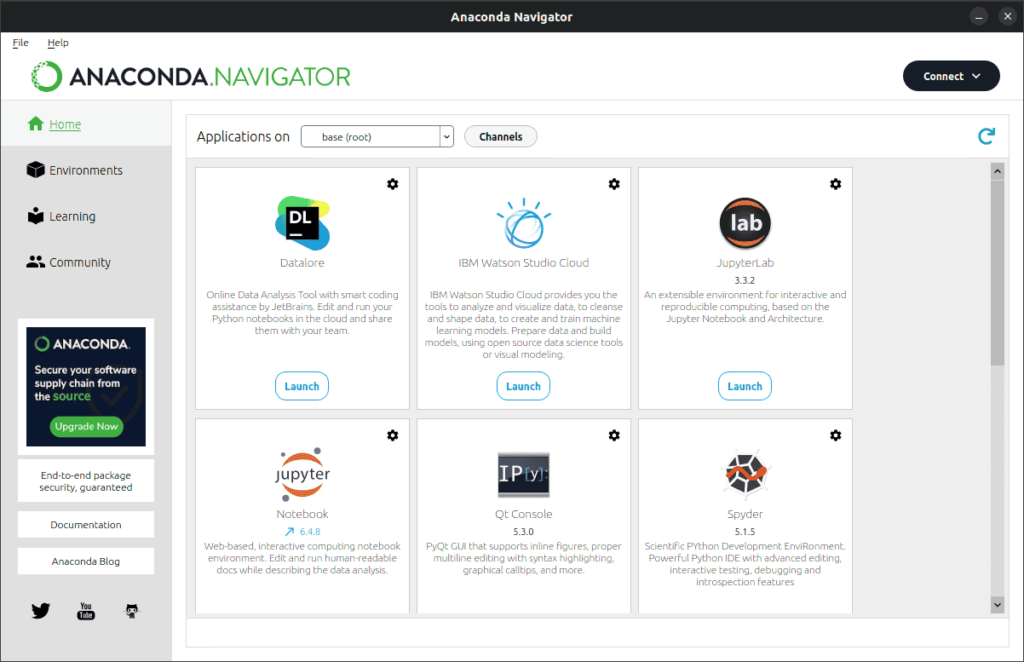
This will launch Anaconda Navigator, providing a user-friendly interface to manage your Python packages and environments, as illustrated in the screenshot below.
Step 8
Updating Anaconda To keep your Anaconda installation up-to-date, simply run the following command in your terminal.
conda update --all
This will ensure that you have the latest versions of all packages installed, keeping your Anaconda environment optimized and secure.
With these steps completed, you now have Anaconda up and running on your Ubuntu 22.04 system, ready to tackle any data science or machine learning project with ease. Happy coding!.
A big thank you for exploring TechsBucket! Your visit means a lot to us, and we’re grateful for your time on our platform. If you have any feedback or suggestions, we’d love to hear them. Looking forward to serving you again soon!