
Jenkins is an opensource tool which helps to DevOps to run their software development which relates to their Testing, Building and Deployment. Jenkins is server based mechanism which can be run on Nginx, Apache, IIS etc. Today in this post, I am going to show you how to install and configure Jenkins using Nginx on CentOS 8 Operating system step by step in a very simple and clear way
Prerequisites
Before you proceed to install Jenkins in your CentOS machine, there are some prerequisites for Jenkins to install Jenkins.
Hardware Requirements: You need a minimum of 1 GB+ of RAM and 50 GB+ of drive space to install Jenkins.
Software Requirements: Java 8, either a Java Runtime Environment (JRE) or a Java Development Kit (JDK) is fine
Steps To Install Jenkins
Step 1
First, install Jenkins Packages
Make sure, we gonna take latest Jenkins Packages from the below repository.
# sudo wget -O /etc/yum.repos.d/jenkins.repo https://pkg.jenkins.io/redhat-stable/jenkins.repo
Import the associated key using the following command
# sudo rpm --import https://pkg.jenkins.io/redhat-stable/jenkins.io.key
Once the key is imported, then all we have to do is update the system which will import all the repositories from the caches
# sudo yum update
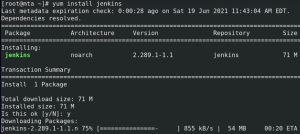
Finally, install Jenkins
# sudo yum install jenkins
Step 2
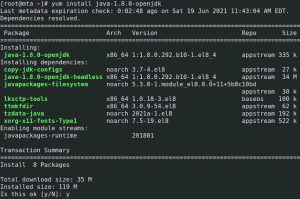
Now, install the supported extension ” java ” , to run Jenkins
# sudo yum install java-1.8.0-openjdk
Step 3
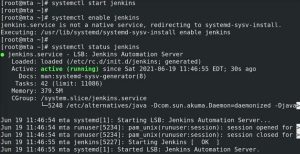
Start Jenkins and enable it on system boot
# sudo systemctl start jenkins

# sudo systemctl enable jenkins

# sudo systemctl status jenkins
Step 4
Enable Jenkins ” 8080 ” Port in the Firewall
# sudo firewall-cmd --zone=public --permanent --add-port 8080/tcp

# sudo firewall-cmd --reload
Step 5
Run the ps aux command and telnet to check Jenkins process running on your system
# sudo ps aux | grep jenkins

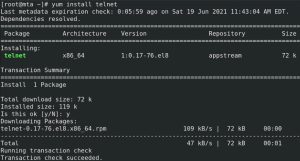
Install Telnet to check Jenkins Port and Jenkins response
# sudo yum install telnet
Use Telnet command on Jenkins port and check response back
# sudo telnet localhost 8080

Step 6
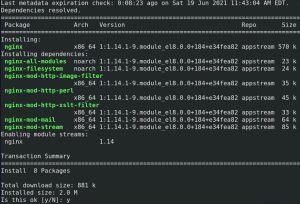
Install NGIX web server
NGINX is a web server that provides whole functionality and easy to configure. Primary thing that we are going to use NGINX explorer to make proxy the connection port 8080 which will work for us over http port 80 connection, install NGINX with following command
# sudo yum install nginx
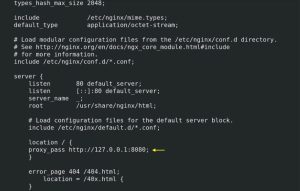
Once NGINX installed, open NGINX config file and edit as per following
# vi etc/nginx/nginx.conf
Find ” location” and add below ” proxy_pass http://127.0.0.1:8080; ” save the file
Restart NGINX after saving the config file
# sudo systemctl restart nginx
Step 7
Disable SELINUX, otherwise Jenkins page will not be accessible
# sudo setenforce 0
Optional
If you don’t want to Disable SELINUX for more security, perform below task to add Jenkins 8080 port in SELINUX
Before opening Jenkins on web browser, check your SELINUX
# sudo getenforce
To permanently unblock SELINUX policy for Jenkins, install SELINUX server tool first to check allowed ports on SELINUX security
# sudo yum install -y setroubleshoot-server selinux-policy-devel
Check allowed ports on SELINUX
# sudo sepolicy network -t http_port_t
We will have to add Jenkins Port 8080 in SELINUX settings
# sudo semanage port -a -t http_port_t -p tcp 8080
To check port 8080 in SELINUX, re-run the command
# sudo sepolicy network -t http_port_t
Jenkins port has been allowed successfully on SELINUX. Finally open web browser with your localhost URL after restart NGINX and Jenkins
# sudo systemctl restart nginx jenkins
Step 8
Add your server host and domain name into hosts file ( If you want to open Jenkins page on connected windows machine within a same network )

Step 9
Open your server URL on any browser once you disabled SELINUX and added host entry
http://mta.mail.local
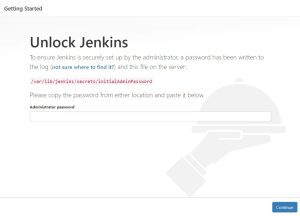
Step 10
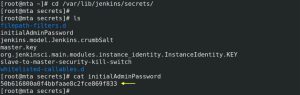
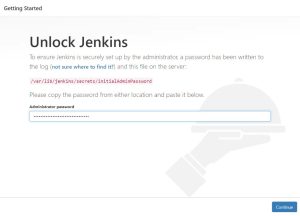
You will see Jenkins screen, find the Admin password in the following directory
# sudo cd /var/lib/jenkins/secrets

# cat initialAdminPassword
Step 11
Copy and Paste Password, hit continue
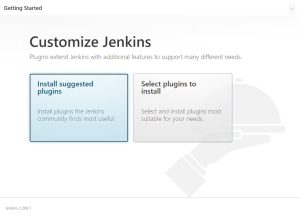
Step 12
Once done, click on the install suggested plugin. This will install supported plugins that will run Jenkins smoothly
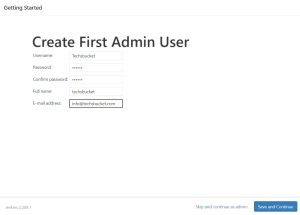
Step 13
Create your Admin user
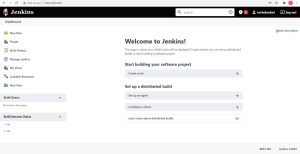
**** Congratulations ! start using Jenkins ****
Also Read : How to install Android Studio
Video Tutorial
Jenkins is usually used by Software developers. Jenkin comes with a lot of plugins, developer first test the part software using Jenkins by CI/CD process which gives the result of software testing.
In this post and video tutorial we have learned how can we install Jenkins on CentOS 8 using Nginx. I just showed some commands step by step which made this post very easy to understand for visitors. Comment below or contact me directly if you have any doubts/queries related to this post, I will definitely revert with a solution 🙂


Wonderful post..very helpful..keep posting