In this post, we are going to learn how can we implement a google AdMob banner ad into an Android Application using Android Studio. By following these steps from this post, you can simply apply AdMob banner Ads on the WebView application or any Android application.
Note : Do not implement AdMob if your Website already has AdSense Ads and converted it into a WebView application.
Steps to Implement AdMob Banner Ad
To implement a Banner Ad, definitely you will need a WebView android application or an android application. You can easily convert your website or blog into a WebView Android Application then easily you can implement an Admob Banner Ad on it.
Also Read : Convert Any Website into Android App
Step 1
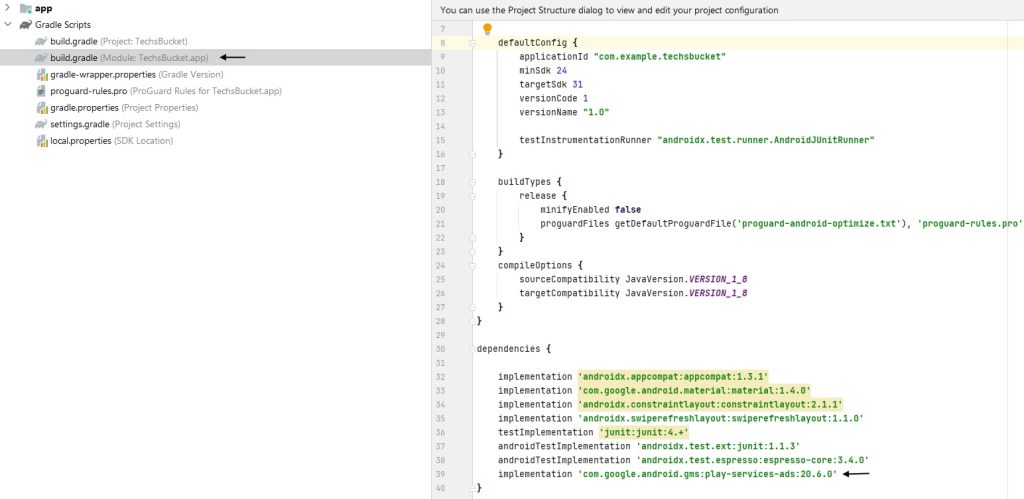
Open your project in Android Studio and go to build.gradle. Copy and paste the below code if the code does not exist. If you have followed my last post of converting a website into an app then code would already exist.
buildscript {
    repositories {
        google()
        mavenCentral()
    }

Step 2
Open build.gradle app and paste the below code in dependencies. After pasting the code, click on Sync which may take 1-2 minutes for syncing.
implementation 'com.google.android.gms:play-services-ads:20.6.0'
Step 3
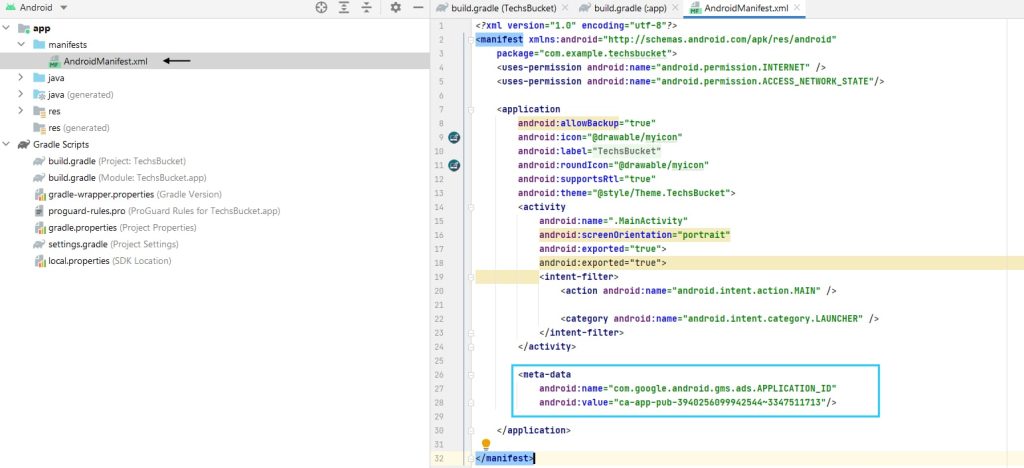
Go to AndroidManifest.xml file and place the below code. We should put the test Application ID first to test the Banner Ad and later we can change it with our actual AdMob Banner Ad ID.
<meta-data
    android:name="com.google.android.gms.ads.APPLICATION_ID"
    android:value="ca-app-pub-3940256099942544~3347511713"/>
Step 4
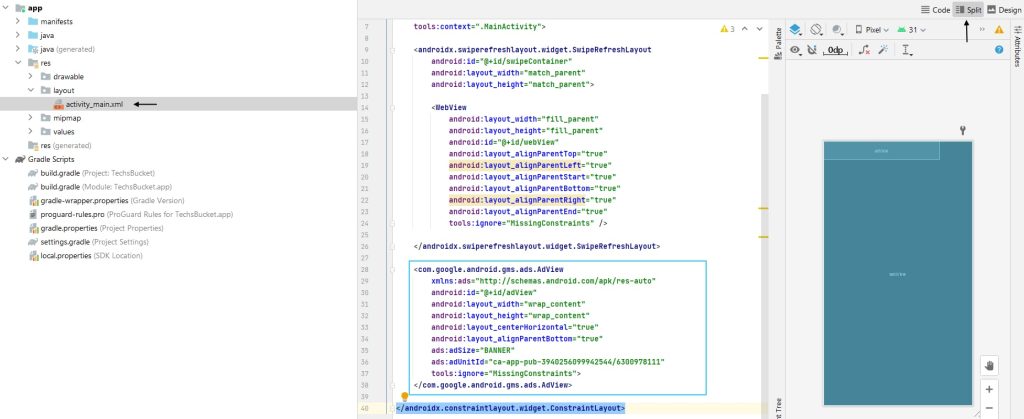
In this step, we will place the Banner Ad code in activity_main.xml file. After pasting a code, you will see an error in the first line. Just left-click on that error line and press the Alt+Enter button, an error will disappear.
<com.google.android.gms.ads.AdView
    xmlns:ads="http://schemas.android.com/apk/res-auto"
    android:id="@+id/adView"
    android:layout_width="wrap_content"
    android:layout_height="wrap_content"
    android:layout_centerHorizontal="true"
    android:layout_alignParentBottom="true"
    ads:adSize="BANNER"
    ads:adUnitId="ca-app-pub-3940256099942544/6300978111">
</com.google.android.gms.ads.AdView>
Step 5
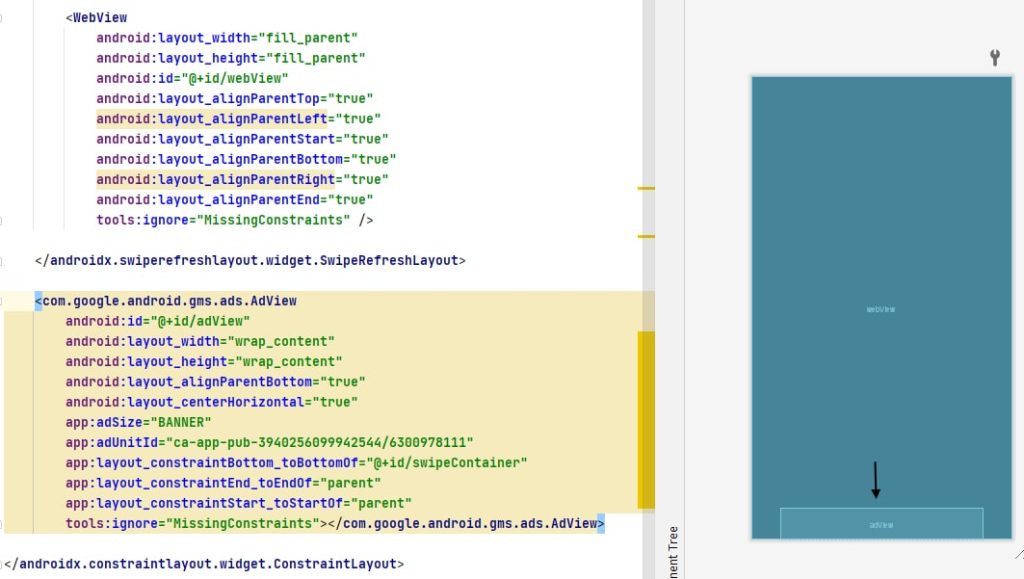
You can simply adjust the Banner Ad by dragging the Ad to the top or bottom. I would suggest, dragging it to the bottom middle.
After dragging into the bottom middle, the code will automatically change.
Step 6
Now, go to the MainActivity.java file and paste the below small code.
private AdView mAdView;
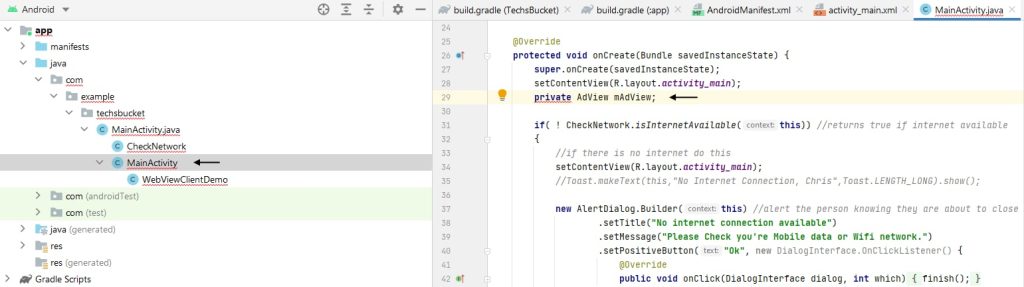
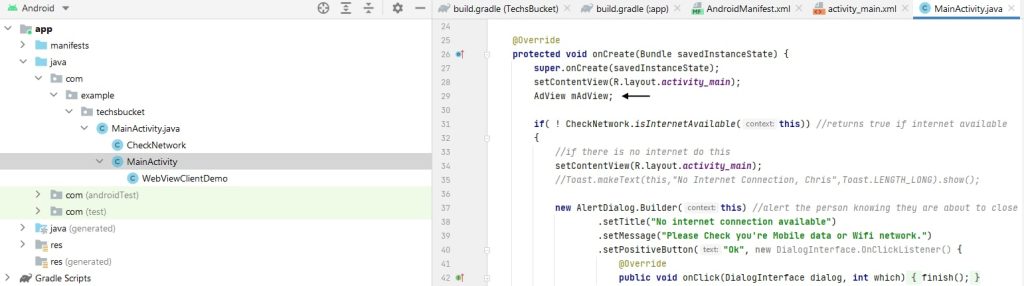
After placing the code, you will see the error. Simply, just click on the error line and press Alt+Enter from the keyboard. Code will change and error will disappear.
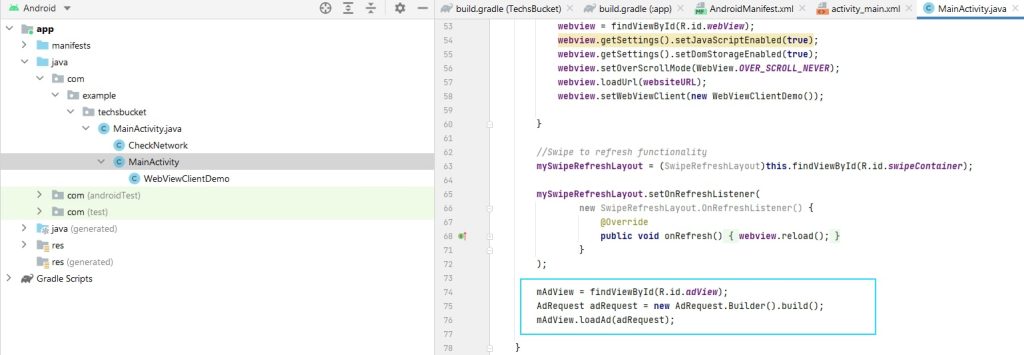
Step 7
In the same MainActivity.java file, place the following code after );. Here, also need to do Alt+Enter on the error one.
mAdView = findViewById(R.id.adView);
AdRequest adRequest = new AdRequest.Builder().build();
mAdView.loadAd(adRequest);
Step 8
Turn on the virtual device from the Android Studio and you will see the Banner Ad finally implemented.

Finally, we have implemented the AdMob Banner Ad on our Android Application using Android Studio. I have shown very simple steps to implement the AdMob Banner Ad. Do not implement any banner Ads in case your website is already showing AdSense Ads.
Also Read : How to save social media status on any Android phone
Also Read : Transfer files from PC to Mobile without USB
Video Tutorial
In this post, we have covered how to implement and adjust Banner Ads on Android Applications using Android Studio. You can just follow the given steps to implement AdMob Banner Ads for your Android Application. Comment below if you have any doubts or if you are facing any issues during implementing Banner Ads.