
Hello Friends, in this post we are going to learn how to install Active Directory On Windows Server 2019 and Make it Domain Controller. Also I am going to show you how we will add Windows 10 Client Host on Domain in a very simple way, stay tuned
What is AD DS ?
Active Directory Domain Services (AD DS) is the main function of Active Directory which manages users and computers under one domain. Active Directory Domain Services (AD DS) is the role within Active Directory that allows server admins to manage and collect information about users and computers which is joined in its domain network. This also helps Server Admins to find each user, group and computer in a Domain Network within the Active Directory and System Admin can Allow permissions accordingly to the AD users
Install Active Directory On Windows Server 2019
How to Install Windows Server 2019
I will recommend installing Active Directory in a Newly Installed Windows Server 2019. Before you proceed, make sure you have created the Admin password of the server otherwise you will face an error during AD installation. Following are the Super Simple Steps to Install Active Directory in a Windows Server 2019
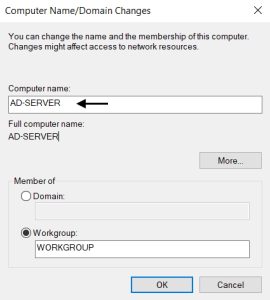
Step 1
The very first step is to set a computer Hostname for your windows server 2019. Go to computer properties then Change Settings Option. You can put your desired Host Name to the Server and Restart the System
Step 2
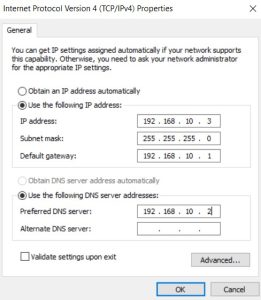
Give a Static IP Address to the Server As Per Your IP Address Range. My IP Address Range is from 192.168.10.1

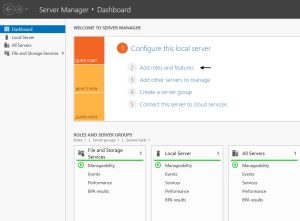
Step 3
Now, we can proceed for AD installation process. Open Server Manager from the Start Menu and Click on Add roles and feature
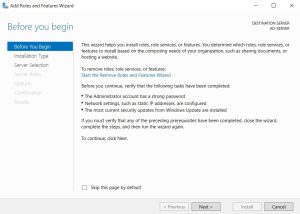
Step 4
In the first screen Just click on Next
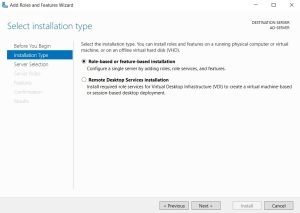
Step 5
Leave it on Default Option that is role-based or feature-based installation, hit Next
Step 6
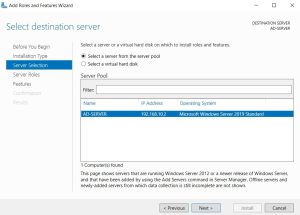
Select your Destination Server that is your Windows Server. You will see your Host Name and IP Address in the List. Keep it on ” Select Server from Server Pool “
Step 7
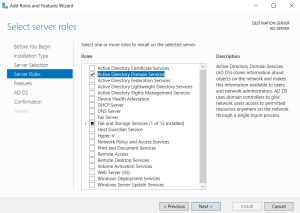
In the Next Screen, Select Option Active Directory Domain Services. After selecting Active Directory Domain Services You Will get a Pop Up window where just hit on Add Features and go for Next step
Step 8
Don’t select any additional option in the next screen, keep it as default and hit Next
Step 9
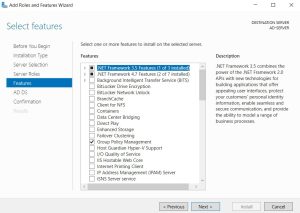
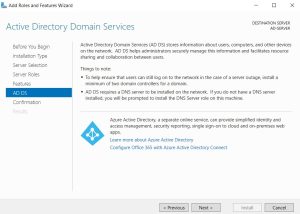
Nothing to do in the Next Step, simply click on Next
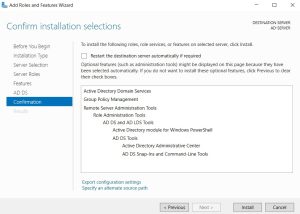
Step 10
The final step is to install the Active Directory, Just hit on install Now
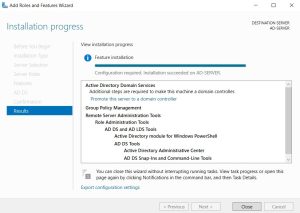
Step 11
This will take some time to install Active Directory on your Server. Click on Close once the installation is completed
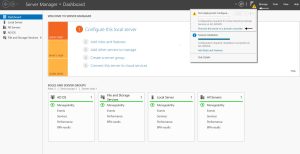
Step 12
Now, go back to the Server Manager and Click on Exclamation Mark Near Flag and Select ” Promote this server to Admin Controller ” Option
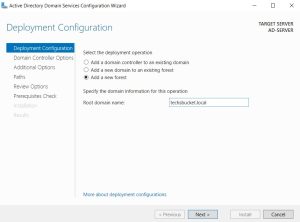
Step 13
This step is for Deployment Configuration. Here you will have to select ” Add a new forest ” because this is New AD Server installation. Put your Domain Name and click on Next, My Domain Name is techsbucket.local
Step 14
Do not change anything here just create a new password for Directory Service. This password will be used while uninstalling Active Directory from the Server

Step 15
In the next step just click on Next
Step 16
In this screen, Net Bios Name will appear automatically based on your Domain Name

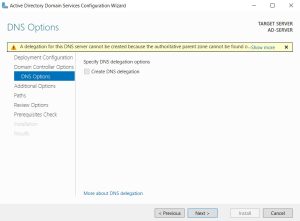
Step 17
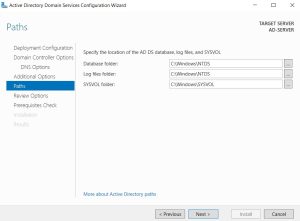
Here you will see the Destination Path of Active Directory Installation. Don’t make any changes and hit Next
Step 18
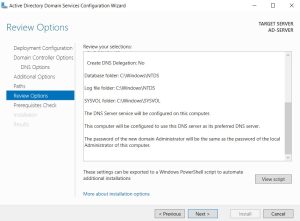
Review Option in the Next Screen. Here we will have to just read and click on Next
Step 19
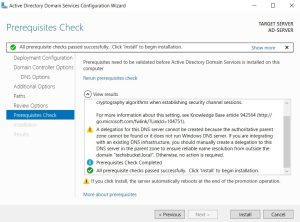
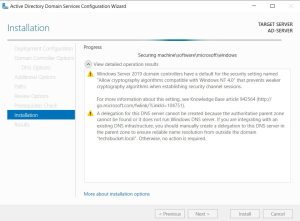
Finally, hit install in the Next Step
Step 20
You Server will be restart automatically once the installation is complete
Steps to Create User Under Active Directory
Once the AD DS is installed on your Server then you may proceed to create a New Domain user under Active Directory. Follow some below steps to create a user in AD.
Step 1
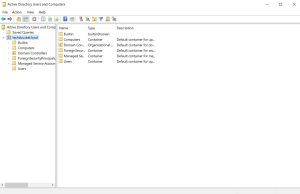
Click on the start menu and search for Active Directory And open the Active Directory Users and Computers. Expand the Options by clicking on Arrow of your Domain Name
Step 2
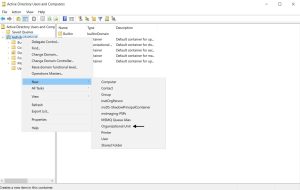
In these OU’s you can create a Domain user anywhere but I will Advice to create a New OU and then Create a New User Under the OU. To create OU Right Click on Domain Name and Navigate to New then Click on Organizational Unit
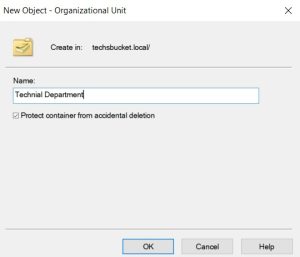
Here I am creating Technical Department OU and Under this OU will be creating New Domain User. Write Any Name for your Organizational Unit
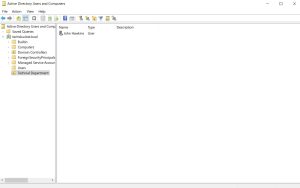
OU is created, next step will be to create a new Domain User Under this OU

Step 3
Create A New Domain User Under this Organizational Unit. Select the newly created OU and right click under this OU. You will see several options, just highlight on New and then Select User
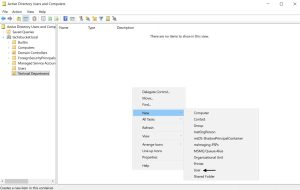
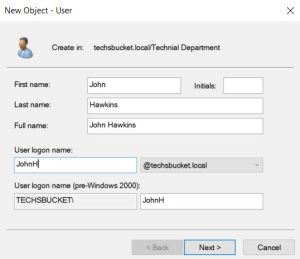
Fill in the details along with the logon Name for this user. Logon Name can be anything but I will Advise keep the logon name as per user’s first and last name and hit Next
Create a password in the Next Screen and Click Next then Finish. Now user is created
Steps To Join Domain On Windows 10
Login to your Windows 10 System with local Admin Credentials and do the following Steps.
Step 1
Give a static IP Address to your Windows 10 System. Remember, your Windows 10 Host and Windows Server should be in a same network Range. Primary DNS would be your AD Server IP Address
Step 2
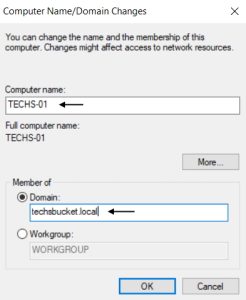
Now, set the Hostname and put the Domain Name of your AD Server which we had setup earlier
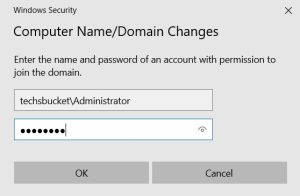
Here, you will be prompt for credentials to Join Domain. Enter the Domain Admin User Credentials as per below screen and click ok. Once credentials are accepted your Windows 10 Host will be restart under Domain Controller
Step 3
Final step is to login on Windows 10 Host System with the Domain User which we have created earlier in the above step. Navigate to the Other User Option and Login
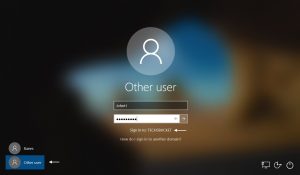
you will be prompt to reset your password. Enter the New Password and You are Done

Step 4
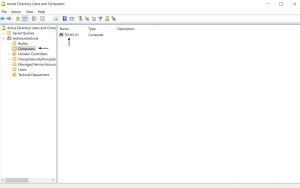
Cross verify Your Windows 10 Host Name should be Appear In a AD Server under Computers OU.
Video Tutorial
In this tutorial, we have covered how to install Active Directory on Windows Server 2019 Operating System Along with How can we Add Windows 10 in a Domain Environment. Comment below for your queries and suggestion or you can contact me any time via contact page. I will be assisting you and try my best to clear your all doubts.


Reading your article has greatly helped me, and I agree with you. But I still have some questions. Can you help me? I will pay attention to your answer. thank you.
Yes ask me