Hi guys, In this article, you will learn how to install MySQL 8 on Ubuntu 22.04. This post is for new learners, but it is always good to have it handy for everyone. So, you can try it by installing Ubuntu 8 on the virtual box or VMware this will be good learning for day-to-day practice.
MySQL Intro
MySQL is a powerful relational database manager owned by Oracle. It is open source but also has dedicated enterprise support, which makes it a great alternative to other paid solutions.
Written in C and C++ it is capable of being very fast and handling many requests per second. This makes it suitable for projects of all types and sizes.
In addition to this, MySQL becomes an important tool for many developers who have it for environment testing.
Steps Install MySQL on Ubuntu 22.04
Fortunately, MySQL is present in the official Ubuntu repositories, so everything has been simplified.
Step 1
Open a terminal and update your operating system before beginning MySQL installation.
# sudo apt update

# sudo apt upgrade

Step 2
Once the system is upgraded, you can install MySQL from the official repositories-
# sudo apt install mysql-server
Thereafter, you can check the MySQL version.
# mysql --version
Step 3
Now check the status of the service:
# sudo systemctl status mysql
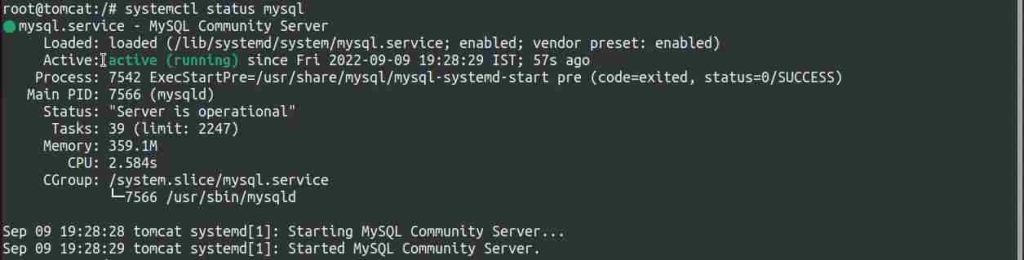
So, all this indicates that MySQL is running and installed correctly.
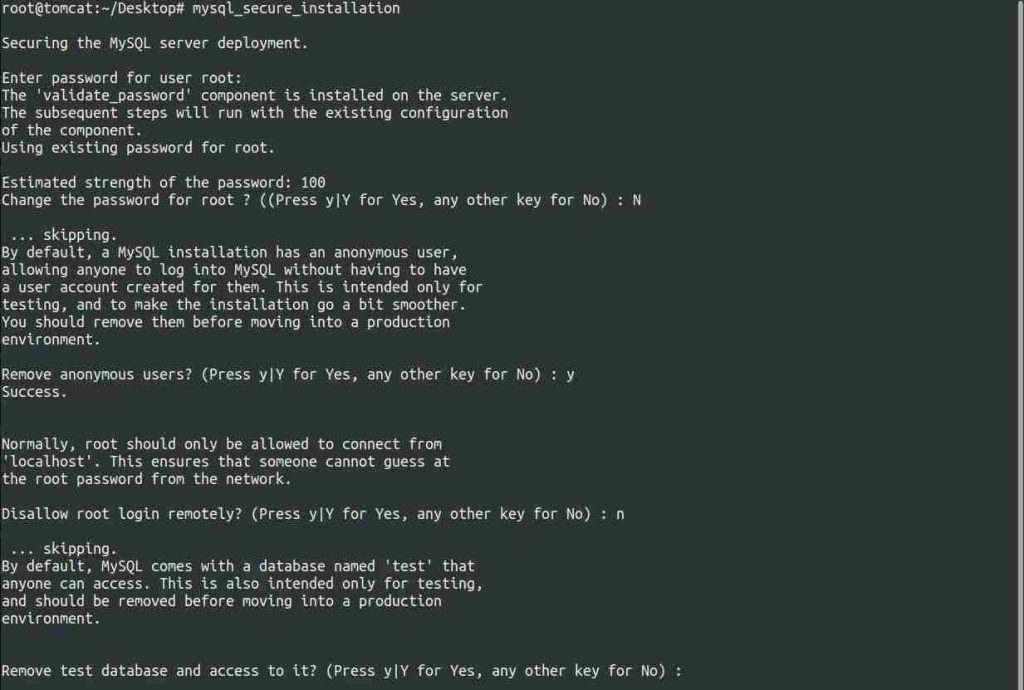
Configuring MySQL
By default, MySQL does not set the root password and some extra settings need to be made.
To achieve this, run this script
# sudo mysql_secure_installation
And there you can, first, choose the password strength level
Please enter 0 = LOW, 1 = MEDIUM and 2 = STRONG:
Then, set the password:
Please set the password for root here.
New password:
Re-enter new password:
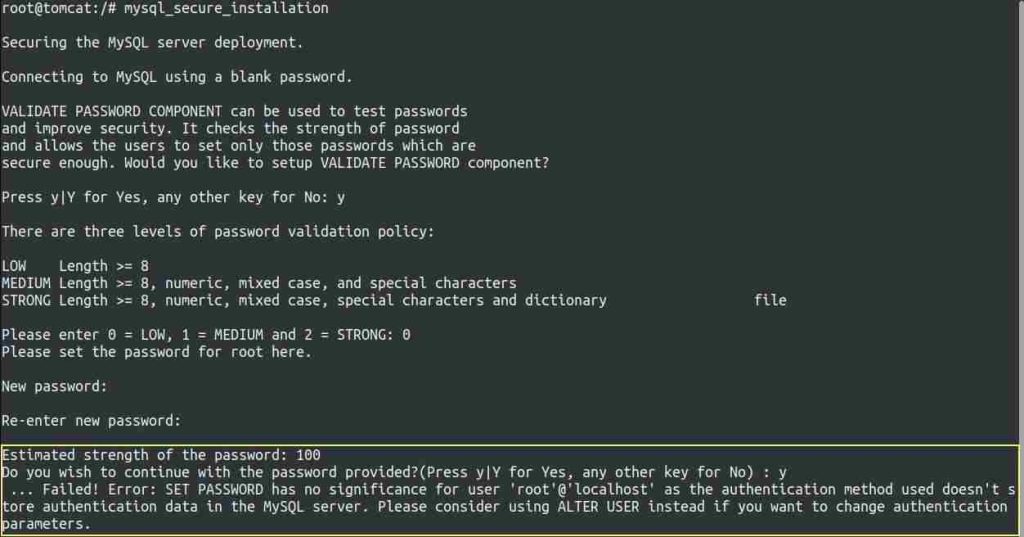
You may see SET PASSWORD has no significance Error but your MySQL root password has been set.
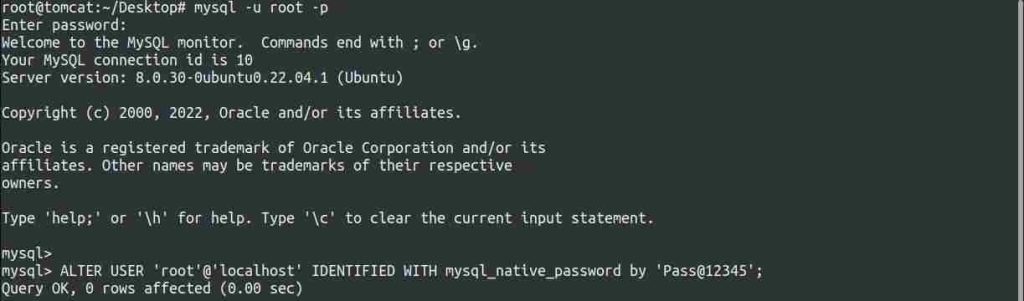
Open a new Terminal and log in to MySQL with the password you set just now and use the following command to resolve MySQL secure installation.
# sudo mysql -u root -p
# ALTER USER 'root'@'localhost' IDENTIFIED WITH mysql_native_password by 'Passw0rd@123';
Exit the MySQL and try the MySQL Secure Installation again, use the same password
# sudo mysql_secure_installation
Remove anonymous users? (Press y|Y for Yes, any other key for No) : y
Disallow root login remotely? (Press y|Y for Yes, any other key for No) : y
Remove test database and access to it? (Press y|Y for Yes, any other key for No) : y
Reload privilege tables now? (Press y|Y for Yes, any other key for No) : y
With this, you will be able to use MySQL
# sudo mysql -u root -p
You will be prompted for the MySQL root password which we have set in the previous step. Put the right password and you are done.
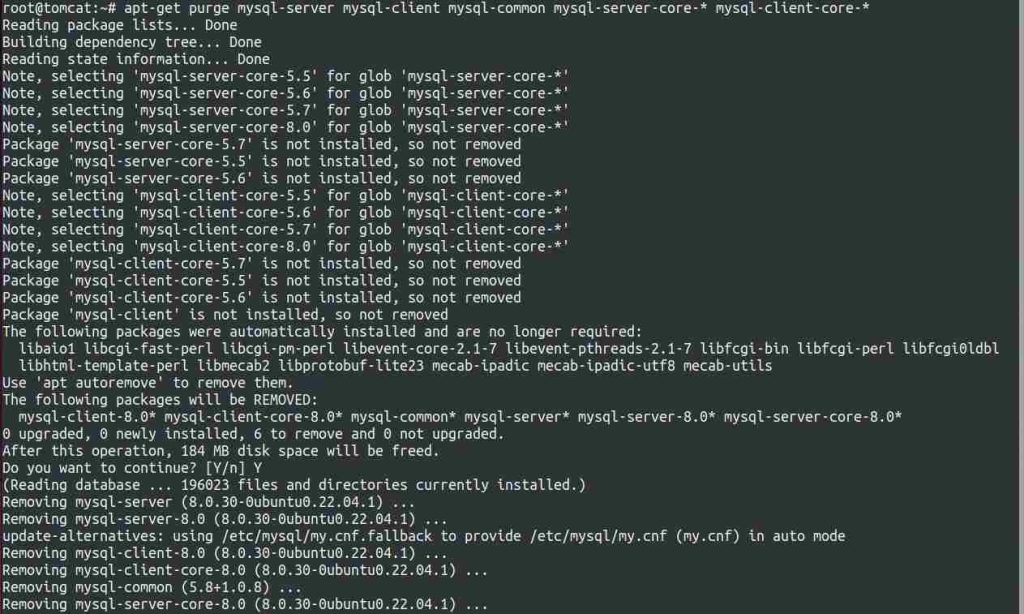
Steps to completely remove MySQL
# sudo systemctl stop mysql

# sudo apt-get purge mysql-server mysql-client mysql-common mysql-server-core-* mysql-client-core-*
# sudo rm -rf /etc/mysql /var/lib/mysql

# sudo apt autoremove

# sudo apt autoclean
Reboot the system once you followed all the MySQL removal steps. Check the MySQL service after rebooting.
# sudo systemctl status mysql
You will not able to see any running and activate MySQL service once you successfully removed the MySQL.
Also Read: Ways to Activate Windows 10 Easily And Safely
Also Read: Setup free SFTP server on windows
Video Tutorial
Conclusion
Thanks to this post, we have covered how to install and Completely remove MySQL 8 on Ubuntu 22.04 with a video tutorial.