In this tutorial, we are going to install SDK Manager and Android Phone Emulator with the Pie 9.0 Android Operating System. This is gonna be very interesting if you are familiar and well versed with Android Devices. Once you have installed Android Studio on your system then follow this article to achieve Android Emulator on your Desktop. Android Studio is available for Linux and Windows 64bit version supported
System Requirement
- Any 64-bit Windows / Linux distribution that supports Gnome, KDE, or Unity DE; GNU C Library (glibc) 2.31 or later
- x86_64 CPU architecture; 2nd generation Intel Core or newer, or AMD processor with support for AMD Virtualization (AMD-V) and SSSE3
- 8 GB RAM or more
- 8 GB of available disk space minimum
- 1280 x 800 minimum screen resolution
Steps To Install SDK Manager And AVD Manager
The wizard will guide you through the initial setup first. Once you have installed Android Studio, Just choose your UI theme and click next, make a not Android Studio will take much time to complete the setup so be patient during the installation and don’t cancel the setup. Let’s have a look at SDK Manager, there’s an SDK for every Android release
Step 1
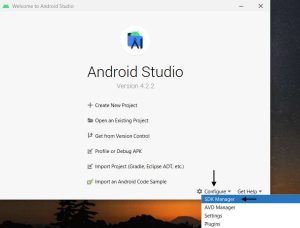
In this tutorial let’s download an old version just to show you the process of downloading an SDK. Click on configure and select SDK Manager
Step 2
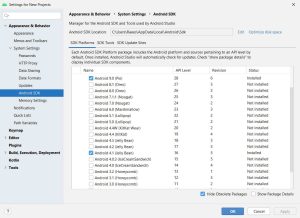
we’ll work with the old version of Android. So just to be safe we’ll run it on an old Android device, So after installing this SDK version you should have the latest version as well as version 16. Here I am going to select Android 4.1 and Android 9.0, You can download as many as you want but it will take a huge time depends on your internet speed and hardware
Step 3
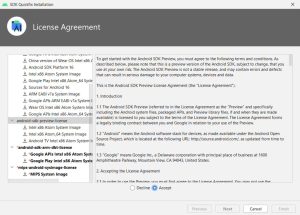
Once you click on Apply, downloading will be started. Remember, this will take much time to download here you will have to show some patients
Step 4
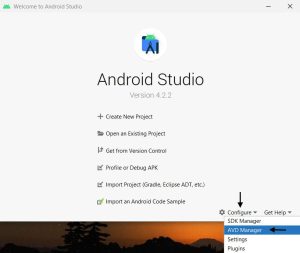
Once SDK download and installation are complete click Finish, Apply, and OK. You will see the main screen again and this time you have to select AVD Manager from the configure
Step 5
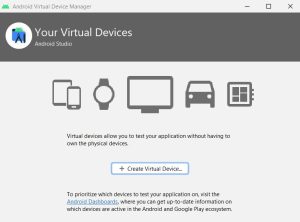
From AVD MANAGER We are going to create a new virtual device, simply click on Create Virtual Device
Step 6
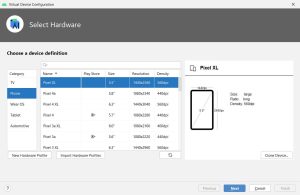
we are going to select the template or the hardware profile so this will configure device-specific configurations. For example the width and the height, the resolution, aspect ratio, and all the stuff specific to different devices. This is important for Android developers when they want to test their UI on different devices, in this tutorial. let’s just choose Pixel XL which is the default one here it will show you what system images are available these will depend on what SDK versions you have downloaded from the previous step
Step 7
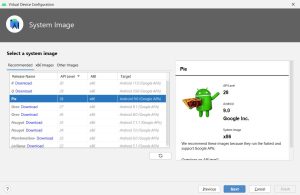
System images will depend on what SDK versions you have downloaded earlier so you see that these are available. You will see a download link next to the Android versions given in the list so we can just click on download and obviously it will take some to download. Previously we already have downloaded Pie 9.0 Android version that’s why we will select Pie 9.0
Step 8
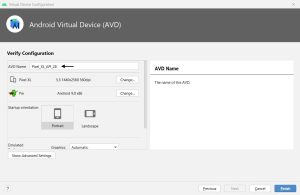
One thing I would like to tell is to remove the spaces in the AVD name and put an underscore instead of space. We do this to ensure that there are no errors caused by spaces when we use a script against a specific emulator. It’s not a requirement but just to be safe then you can click on advanced options.
Step 9
Once you click on the finish, you will find the AVD that you have created. Just click on the play symbol to launch your Android Emulator

Step 10
Here you have some extra tools that you can play around with. So for example say you want to emulate sending or receiving an SMS. You can do that using this utility over here. Just click on the three dots on the side and then for example you can play with the accelerometer sensors. You can also play with the battery levels etc
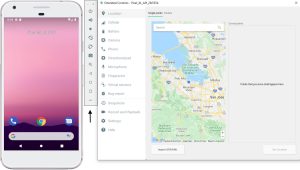
Keep in mind that the emulators are mainly targeted towards Android app developers, not reverse engineers. So these tools are extremely useful for developers but as a reverse engineer, you might encounter instances where you would need these tools, say for example you find malware and you think that it only works in a specific location.
Also Read : How to install Android Studio On Ubuntu
Video Tutorial
So Friends, In this tutorial we have covered how to install Android Mobile Emulator with Android Studio. Now we always need to keep in mind that this is an emulated device you might encounter some crashes or errors. Perfect system emulation is not easy so you cannot expect the emulator to work 100 percent like a normal device but overall it’s very good for testing and in our case, it’s very good for malware analysis.


Very clean content, keep it up