
Hello Friends, today in this post we are going to learn how to install Moodle On CentOS 8. Moodle program is written in PHP language and it is an Open Source Learning Management System.
What is Moodle ?
Moodle is Modular Object-Oriented Dynamic Learning Environment. which provides a centralized platform on the web where employees or students can access Moodle tools, resources and courses anytime from anywhere.
Moodle is the most popular, trusted and large learning management system that suits for all types of organizations, no matter how large.
Before we proceed, you will require a CentOS 8 instance. If you don’t have one already, you can buy a VPS with Hostinger, GoDaddy or Bluehost at a very cheap price. Deploy a fully managed VPS or cloud server at reasonable cost.
Steps to Install Moodle
To install Moodle On CentOS 8 you will require the following services with Moodle’s latest script files in the CentOS 8 Apache root Directory.
Step 1
Install Apache Server
To install Apache Server run the below command and start the services, first update the server.
# sudo yum update -y

# sudo yum install httpd

# sudo systemctl start apache.service

# sudo systemctl enable apache.service
Allow the Apache ports in the firewall
#  firewall-cmd --permanent --add-port=80/tcp

#  firewall-cmd --permanent --add-port=443/tcp
Step 2
Install MariaDB Database Server
Run the following command to install MariaDB
# sudo yum install mariadb-server
After installation, start MariaDB and enable it on boot
# sudo systemctl start mariadb

# sudo systemctl enable mariadb
Secure installation MariaDB
# mysql_secure_installation
- Enter current password for root (enter for none):
- Set root password? [Y/n]
- New password :
- Re-enter new password :
- Remove anonymous users? [Y/n] :
- Disallow root login remotely? [Y/n] :
- Remove test database and access to it? [Y/n] :
- Reload privilege tables now? [Y/n] :
Check the status after installation by the following command, if MariaDB has successfully started then the status should be active.
# sudo systemctl status mariadb
Create Database user and password which will be use in Moodle configuration
# sudo mysql -u root -p
Enter your root password which you had set at the time of MariaDB installation and create database as well as set the full permission on the database
# use mysql

# create database moodle;

# create user test;

# grant all privileges on moodle.* to 'moodle'@'192.168.10.200' identified by 'your-pass';

# flush privileges;
Step 3
Install PHP 7.XX
Run the below command to install PHP on CentOS 8
# sudo dnf install dnf-utils http://rpms.remirepo.net/enterprise/remi-release-8.rpm

# sudo dnf module list php

# sudo dnf module reset php

# sudo dnf module enable php:remi-7.3
Install some common modules of PHP
# sudo dnf install php php-opcache php-gd php-curl php-mysqlnd

# sudo systemctl enable --now php-fpm
Allow PHP to work with Apache
# sudo chcon -Rt httpd_sys_rw_content_t /var/www

# sudo systemctl restart httpd
Step 4
Install PHP Extension
Remember, these extensions are mandatory to run the Moodle installation, without these extensions you will not able to install Moodle.
Install PHP xmlrpc Extension
# sudo yum install epel-release

# sudo yum install php-xmlrpc
Install Soap Extension
# sudo yum install php-soap
Install PHP XML Extension
# sudo yum install php-xml
Install Mbstring Extension
# sudo yum install php-mbstring

# sudo service httpd restart
Install Intl Extension
# sudo yum --enablerepo=remi install php-intl
Step 5
Download Moodle from its Official Web Site and Keep it in /var/www/html which is Apache root Directory
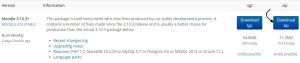
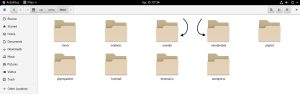
Now, Extract the Downloaded Moodle Zip and Copy Unzipped ” moodle ” Folder into /var/www/html and create ” moodledata ” folder in the same directory.
Step 6
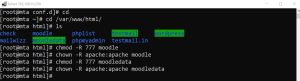
Set the Apache and Full Permission on both the Moodle folders
# sudo cd /var/www/html

# sudo chmod -R 777 moodle

# sudo chown -R apache:apache moodle

# sudo chmod -R 777 moodledata

# sudo chown -R apache:apache moodledata
Step 7
Create Apache virtual Directory for Moodle
# sudo cd /etc/httpd/conf.d
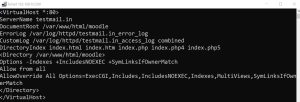
# sudo vi moodle.conf
Copy and Paste Below text into the new moodle.conf file and save the file ( Highlighted Replace with your domain Name )
<VirtualHost *:80>
ServerName testmail.in
DocumentRoot /var/www/html/moodle
ErrorLog /var/log/httpd/testmail.in_error_log
CustomLog /var/log/httpd/testmail.in_access_log combined
DirectoryIndex index.html index.htm index.php index.php4 index.php5
<Directory /var/www/html/moodle>
Options -Indexes +IncludesNOEXEC +SymLinksIfOwnerMatch
Allow from all
AllowOverride All Options=ExecCGI,Includes,IncludesNOEXEC,Indexes,MultiViews,SymLinksIfOwnerMatch
</Directory>
</VirtualHost>
Finally, restart Apache Services
# sudo systemctl restart httpd
Steps to Configure Moodle
Step 1
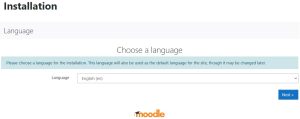
Open your web browser and put the Moodle server IP Address in the URL
192.168.10.200
Moodle Configuration Page Will Be Appear. Select Your language and hit next
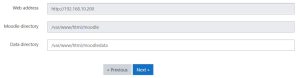
Step 2
Do not make any changes and click Next
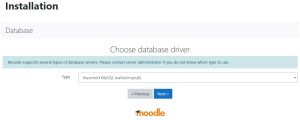
Step 3
Keep it on the MySQL ( Native / MySQL ) hit Next
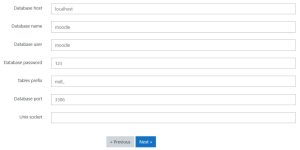
Step 4
Put the Database and Database username along with Password, Database Port which your have created earlier
Step 5
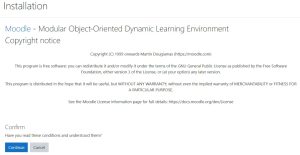
On this screen, you can read the Terms and Hit continue to check extensions window
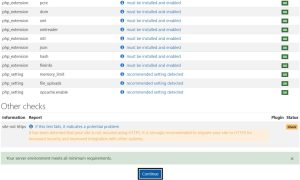
Step 6
In this step, Moodle will check all the extensions to run. If Moodle found some extension missing error then it will not be continue and it will be stuck in the checks screen. In the above steps I already have guided about Moodle extensions.
Note : If you have installed MariaDB then do not forget to change “MySQL” to “MariaDB” in the Moodle config file otherwise you will get an error during Moodle installation. Moodle config file is located in /var/www/html/moodle/config.php

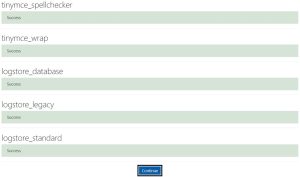
Step 7
It will take some time to check and complete. If everything is perfect you will see continue button.
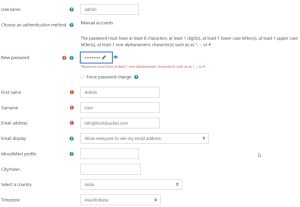
Step 8
In the Next Screen Fill the Basic Details along with Username and Password which will be used to Sign in Moodle, Hit Next
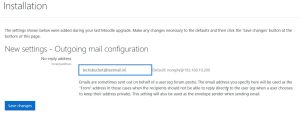
Step 9
Now, Enter your No-Reply Email Address Click Save Changes
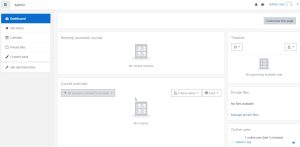
Step 10
Congratulations, you are done and finally Moodle Home Page will be Appear
Video Tutorial
In this tutorial, we have covered how to install And Configure Latest Moodle LMS. Comment below for your queries and suggestion or you can contact me any time via contact page. I will be assisting you and try my best to clear your all doubts

Nice Post.. Thanks
steps are very clear.. Thanks